


Posted:
Originally posted by: 18shabbo
@AfflicteD , thanks for the Undo tut! really helpful😳, i may move it to 1000 history states if possible😆
You definitely can!😳 1000 is the maximum number of history states that u can apply 😛

Bigg Boss 19: Daily Discussion Thread-2nd Dec, 2025

FAKE FIGHTS 2.12
FAMILY TREE 3.12

🏏South Africa tour of India 2025: India vs SA - 2nd ODI🏏
Yrkkh gen 3 feud - new low 📯

Dhurandhar - Advance Bookings Open
5000 episodes of YRKKH
Tribute To Legacy
What made you guys start watching?
Dr Kaira Chapter Discussions Thread
Rana Daggubati and Dulquer Salmaan disagrees with Deepika’s demands
Ranveer Singh Apologises
Trending everywhere that media has problem with Jai Shri Ram
Downfall Of Govinda

🎄 Elves of the Bookshelves 🎄 | BTRC • December 2025
🎅🏼 Santas Of Storyland 🎄Dec 2025 Book Talk

2nd December episode Discussion thread
Journalist talks about experience interviewing Kriti Sanon
🌟Gingerbread Page Turners 🎄BTRC December 2025🌟

The days of friendship and love Season4 SS IshVi RishRee
Originally posted by: 18shabbo
@AfflicteD , thanks for the Undo tut! really helpful😳, i may move it to 1000 history states if possible😆
Originally posted by: 18shabbo
Brush..? Its called floral. Had downloaded this set ages ago...there some 15 brushes in it and I use them all together, thus it looks like this.
You can find some on Deviantart, thats where I had downloaded from.😊


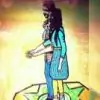
A lot of times ago I have promised to 2 people that I will make a tut for the Avis, and finally I managed to make it, okay let me warn you when it comes to explaining I'm really bad and second I took too much time to explain so bear it 🥱
This is what I made just for this tut, yeah I know it's not that lovely, yaar I don't have imagination😆, but I'm pretty sure you guys will use this tut better than me 😉.
I made a tut of 20 frames/steps but not all are related to the tut itself maybe few can be helpful in doing other things
Before starting I want to Thanks LazilyAnymous, my Amore, for teaching me this, Love you Amore 🤗
To make something like this you have to follow the these steps
I'm going to use this gif
http://i.minus.com/ibjU8NONNqmfIK.gif
First step, open a new document of any size, mine is 600x400 px.
http://i4.minus.com/jpH0p69obAEqE.png
Chose a background, you can fill it with a color or put a texture as a background, I'll take a texture (credit Kinjal)
http://i1.minus.com/jLdKN1QF6qzKZ.png
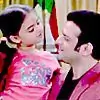
Now chose the pics that you think will suite your gif, I think this is quite important because you can't use dark pics for a light gif or wise versa it will look out of place, this is just my opinion ignore it, it's not a part of the tut 😆
http://i2.minus.com/jzNYoa3K8iBcP.png
http://i1.minus.com/jdb7xRucZHn6r.pnghttp://i1.minus.com/jbfUFztcGcf1Lx.png
^^ as nothing to do with the tut, i made it so if anyone need to know how to cut out pics easily and without to much perfection 😃😆
Make your siggy, but don't forgot to leave some space for the gif, the space that you need to left blank depends on your gif if your gif is big you need more space, and I think this you guys already know, so let's move forward.
Once you are satisfied with your siggy save it as a PNG file.
Now open a new document of the same size of your siggy mine is 600*400 suppose I call it Avi
Now go in the timeline box and duplicated the Avi layer for the number of the Gif's frame, my gif as 12 frames so I will duplicate It for 12 times (you need to open your Gif in PS to know how many frames it has)
Select all the frames -->click on the little arrow on the right side of the timeline bar
Now go to your Gif document, in timeline bar click on the little arrow and click on "select all Frames" one they are all selected, again click on the little arrow and click on Copy frames.
Go to the Avi document, where you have previously selected all the frames, now click on the little arrow in the timeline bar and select "Paste Frames" a little window will come out, you need to tick on Paste over selection and Link added layers. Like in the pic
Now you Gif is in the new document, resize it and place it where you want it, which should be under the blank place in your siggy.
Now open your Siggy that you have previously saved and drag it over the gif, DON'T WORRY if it doesn't show in all the frames it happens sometimes. Click on any frame, in this way the frames will be deselected, once done, select all the frames again and click on the little eye near the siggy and voila you siggy will magically appear in all the frames.
Now you need to change the mode of the siggy in a way that you are able to see the gif beneath the siggy, try with softlight, or difference ot divide anything that make you see your gif.
Now with all the frames selected and with the siggy layer selected, click on the eraser tool and delete the part of the siggy that is above your gif, once you know where you have to delete you can change the siggy mode in to normal one, in this way you will be able to see what you want to delete and how much you want to delete.
When I delete I prefer to use a weird brush (believe me it's use is for something else, but I use it as eraser too😆) and put the opacity around 50/60, define the area that you want to delete and then you can change the opacity to 100/90 whatever you want.
Now that you are satisfied with your deleting session, you can apply any effect or do adjustments or apply a textures, it's really simple, just remember to have always selected all the layers, and if you see that an effect or the texture is not showing in all the frames deselect and reselect the frames and then click on the little eye near the effect/texture layer, sometimes you need to click twice on it, once to disable it from the only one frame where it is visible and the second one to make it show in all the frames
http://i2.minus.com/jSTqyXBfaPdzj.png
http://i4.minus.com/jlH6hOQpW8rsU.png
http://i5.minus.com/jz0UzE9TkagmC.png
Hope it helps
I think this is the longest tut ever 😆 😆, if you need any help feel free to scrap or PM me 😃


This is a thread where you all can share everything anything, be it be a Tutorial, PSD, Suggestions, Textures, Animations, etc Try and avoid too...


849