Tutorials

I don't get the hype around Dhurandhar Returns

RISTA PAKKA 14.3
TRUST NAHII15.3

Sabse accha biological bacha kaun?
Dhurandhar 3
RGV Says Industry Is Jealous Of Yami And Aditya Dhar
Aamir Khan Finalizes Two Scripts
Happy Birthday Aamir Khan
Originally posted by: -Koeli_Appy-
Siggy Making with Blur Effect
Its a very simple and a very process. It doesnt take much time yet it gives a beautiful brokeh effect. And the best thing is you dont need any additional texture.
Step One : I have selected a merged pic [to know how to merge two pictures click here] and duplicated it.
Step Two : Select the duplicate layer, go to filter, choose gaussian blur from the blur panel. Select the parameters as shown in the pic.
Step Three : Click control T and rotate the blur layer upside down.
Step Four : Merge all the layers by clicking Control/Command+E. Then go to Layer > New Fill Layer > Gradient.
Step Five : Select the parameters as per the picture below.
Step Six : Change the layer mode to overlay
Step Seven : Lets add some text. Change the layer mode to colour burn
We are Done!!
Let let me know how do you find it. Your comments will be appreicated.
Thanks
Chao!


This is a thread where you all can share everything anything, be it be a Tutorial, PSD, Suggestions, Textures, Animations, etc Try and avoid too...


 Forum Games
 Mahadev And Sons
 Anupamaa
 Hindi TV Shows
 Debate Mansion
 Fan Fictions
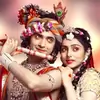
![RiKara SS ~ Safed [15/03]](https://img.indiaforums.com/userimages/12/8782-899662.jpg)


850