Tutorials

Bollywood At CJP Protest
"You don't have a spine". Fan slams Katrina & closes her 70k fan page
Man with a spine!! Naseeruddin Shah speaks on student protests

TUTORIAL#4
First Tutorial Link:-How to make an animated gif without Photoshop?
Second Tutorial link:How to make a blinking text effect without Photoshop ?
Third Tutorial Link:How to make a banner without Photoshop ?
Fourth Tutorial Link:How to make a basic siggy with Fotor (below)

Hi people (:
I made this tutorial long ago,but posting it now :D
And,the editing software is "Fotor banner maker" :p
found this after making the banner.
The thing which is changed is the size.Nothing else.But still preparing a tut for it.But it'd be more complicated than before 😲 :P
Step 1:
Open Fotor Banner maker.But this time,the size should be 500*300.
Step 2:
Add pictures.I've added six pictures altogether so that i don't need to save them again and again.For adding pictures,you need to click on Add photos which is in the rightmost side.You can add pics from computer,web,fb,flickr.
Step 3:
Drag the pictures to the canvas.A pop up box would appear.
For changing the size of the picture you can either click on size,and change however you want.Or you can,click on the right button.
There will also be a Merge option,in the last o the pop-up box.I've clicked on hardlight in that.Though it isn't used for that purpose.
I've even marked it here in this pic :D

Step 4:
Click on the close button.
Add another picture now like I am doing.
Drag it in the same way as you did it to the last picture,and change the size as you want.
It will be certainly,overlaying the other pic.
So,in the pop-up bar,there will also be an eraser option,click on that.
Choose the size,and the hardness.The less the hardness,the more the good it will be for the siggy :)
You may not be able to add the merge option in this as it will make the picture a little transparent right ? So leave it as it is.

Step 5:
Again add a pic and do the same.
You should be careful while erasing.If the hardness it very less,then the pic may not appear to be good.
You need to add a bunch of pics now.
If you wanna undo what you've done then click on CTRL+Z
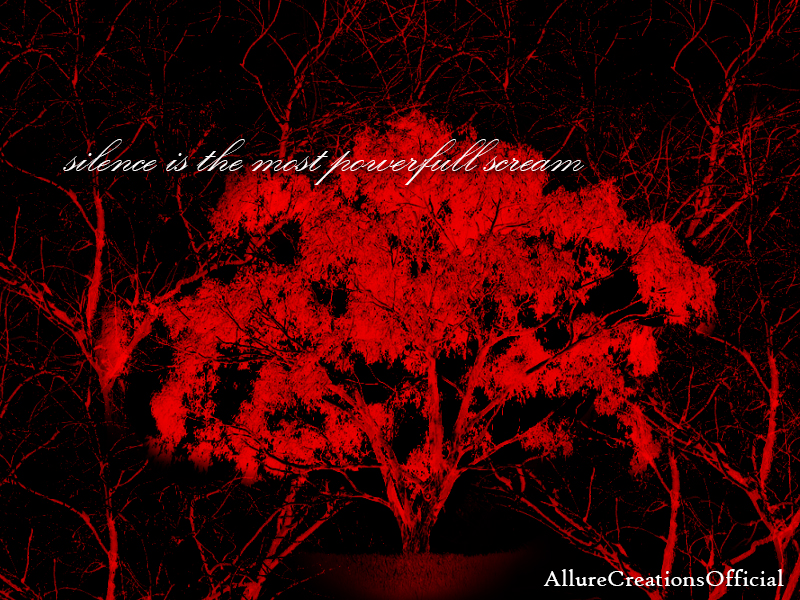
My siggy looks somewhat like this:(Its bad i know,but showing it as an example)
Step 6:
You've made the siggy.So save it now.The save button is on the top,and then look at the left side of your screen.There is the SAVE AS option.So save it in either png or jpg.
Step 7:
But it looks dull without effects.So go to "Photobucket" and EDITOR.
Choose your pic,and give a bunch of effects.
Step 8:
So first of all I am going on effects,then classic,and then choosing "Soft focus"
Apply it.
Then again go to effects and this time go on "Signature".
I am taking the "avenue" effect.
I am giving contrast,brightness,sharpness as well,but its your wish.
Now give text.There are many fonts.
I've given mine,and even changed the color.
Step 9:
Save it.
Step 10:
I've given mine effects,text,and everything,you can even give yours.
The siggy looks somewhat like this.I hope it isn't bad. :D
Pic credits Sano88

**
Okay,I am done with it.I hope this tutorial could help you people !
Do give your comments,and tell me if it was useful or not.
I don't use this editor,if someone thinks that :p
The advantage in this is that it won't ever crash like ps :) it bothers a lot !!
Ignore typos.
-
Rhea
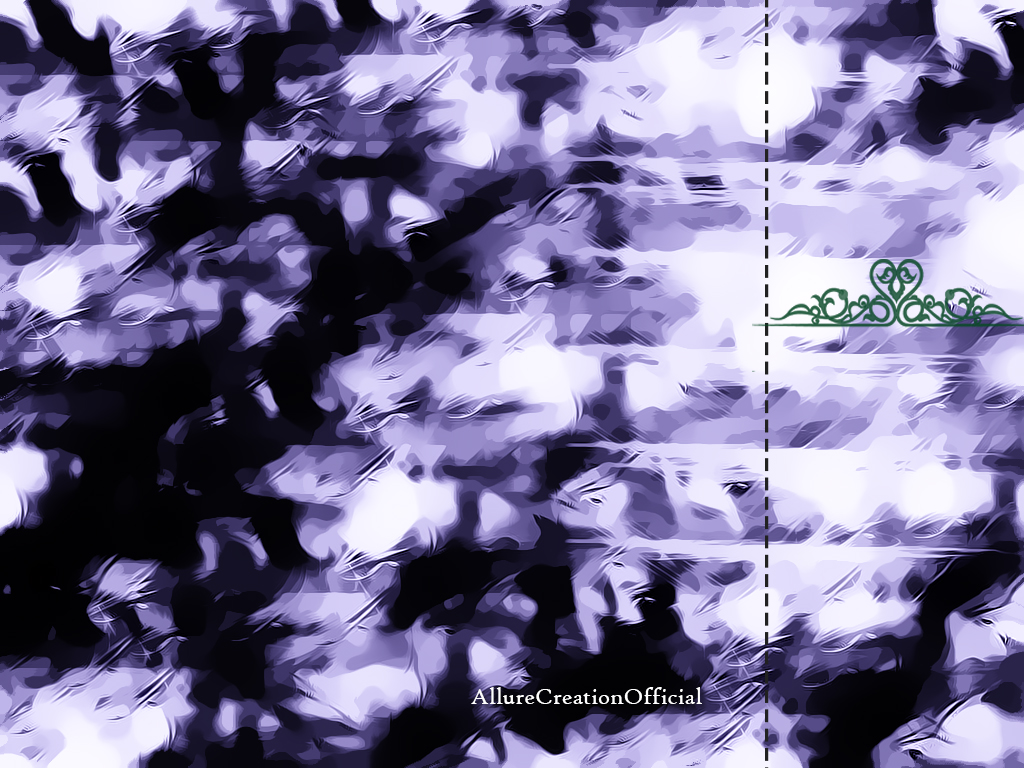
TUTORIAL FOR SIGGIES
As promised I'm here with the tut that can help you to make siggies like the following one

Requirements: Basic knowledge of PS and it's tools, especially the gradient tool and Layer Mask
So let's start:
1) Open a new document in PS
2) Drag the pictures that you want to use in the new document
3) Select a proper background. You can changed it later if you want, but normally I select the right background before start working, because I think in this way, I can managed the blending work properly and see if I like the effect that I'm getting during the process. I mean if the backgound suits the pics.
4) Adjust the pictures accordingly to your likes, you can change the positions later too, so it's not something on which you can't put your hands later.
A) This is what I have, the start point

5) Select a Pic, click on the layer mask button, which is near the blending options key, on it's right side.
6) A white box will appear on the right side of your picture, that box is called "Layer Mask"
7) Now with the layer box selected, you can know if your layer mask is select by the existence of a box/broader around it, select the Gradient Tool.
8) The gradient should be black/white, in normal mode and opacity 100%
B) Just like in the picture

9) Now you can start the blending/merging process and to do so you have to drew a line on your picture and the tool will do the rest.
10) The line should go from the edge toward the inside of the picture. Press the mouse once you are near the edge and then with the mouse pressed move toward the inside of the picture. On your picture you should see a gray line being traced
Suggestion: I advise you to start from the top pictures and then pass to those which are in the background, in this way you can see if you like the effect and till which point you need to work on them. If the effect is not coming like what you think, try to reduce the size of the lines that you drew.
C) Look in the picture, the line is not visible, but it's there.

D) See how the gradient tool works

11) Once you have done one side, you have to delete the layer mask and put on another one if you want to merge the other side of the picture. Because if you try to do the other side with the same layer the previous one will get restored. I mean the picture will turn normal.
I don't know if what I'm saying is true or not, but with my PS it works like this only.
12) Select the layer mask and click on delete, a window will appear, it will show
Apply: click if you want to apply the mask/correction that you have done
Delete: click if you want to restore the picture
Cancel: click if you clicked by mistake on the delete button
E) check the picture below


13) If there are parts that you can't delete with the gradient tool, then you can do it by your own. And to do so follow the following steps
13.1) Put a layer mask on your pic, just like you put it to use the gradient tool
3) Select the brush tool
13.2) Select a soft brush of the size you wish, but I suggest you to stay between 12-20
5) Set the opacity between 15-25%
13.3) The color of the brush should be black, normally when you select the brush tool after selected the layer mask, it automatically set the black as the color for the brush
13.4) Now start passing the parts that you want to delete/fade. The more you will pass the brush on a part, the more it will get faded.
POINT: to get a good effect you have to press the mouse button and don't release if till you don't have faded the entire part that you want to merge/delete. Because if you start releasing and pressing the mouse the fade/delete effect will not look homogenous. Remember each time you will release and press the mouse button the part already deleted will got deleted more once you pass on them again.
F) Check the picture

14) When you are done put some good effects and the work is done. Once you got how the thing work everything will get more simple and easy.
Hope it helped. For any other questions feel free to scrap or PM me.
P.S. you can apply this method on Gifs too, but before apply it, you have to group the layers of the Gifs and then on the group folder put a layer mask.
-Preet-


Hey friends Welcome to Questions Queries Corner Please post all your questions queries here instead of making new topics. If any "help" topics...
Hello everyone, Welcome to Avatar Signatures Shop Forum Banner Contest 2026 Winner Announcement Thread. First of all, thank you to everyone who...
This thread is "Creations Exhibition #5 " where you can show off your latest work. And it is for everyone including members who have a...
Hello everyone, Welcome to Avatar Signatures Shop Forum Banner Contest Voting round . Before you jump in, please do read the rules. ❤️ Y ou can...
Hello folks! Welcome to another brand new Avatar Signatures Shop Forum Banner Contest 2026. Before you jump in, please do read the rules. 💛...


 Kyunki Saas Bhi Kabhi Bahu Thi 2
 Anupamaa
 Web Series


395