
Bigg Boss 19 - Daily Discussion Topic - 7th Sep 2025 - WKV

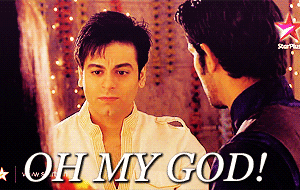
Yeh Rishta Kya Kehlata Hai - 07 Sep 2025 EDT
NASEEB vs BADNASEEB 7. 6
Generation 5:A new chapter in Yrkkh
Yeh Rishta Kya Kehlata Hai Sept 8, 2025 Episode Discussion Thread

「 ✦ Font-tastic Voyage Graphic Contest ✦ 」
BHAGODI MAIRA 8.9

The ba****ds of bollywood trailer
Originally posted by: -She-loSarun
Hey preet, ur scattered paintings are amazing... U inspire me to make better edits. Thanks dear
U P D A T E
Dheere Dheere


(was indecisive with which one to keep, so posting both)
Kick

Sunona Sange Maaar Maar

(i love this song to the core, one of my favorites)
F O R C O NT E S TS
Tumhi Ho Bandu Sakha Tumhi Ho

^ Runner-Up Lost for one vote 😆


Dilli Wali Thakur Gurls


Tashan-e-Ishq

F O R G A M E


(it didn't come really good, well made in 5 minutes only, so it's kinda okay😆)
T AGS
Sharing a tag which is really close to my heart

^ made this tag a year ago and till now it's one of my favorite 😃
Aamir Ali's Birthday


(not that much happy with it, but still posting)

^ this is a border/divider you are feel free to use
R E Q U E ST
For -Trishh-
First of all sorry for taking so much time, but was busy with a game.
Made two versions.


L E S S O N #1
(feeling like a teacher 😆)

^ this is the tool bar.
Normally it is always visible when you install PS. If it is not then just go to Windows
and select the second last option "Tools"

MOVE TOOL: it helps you in dragging the pics, adjusting their size and so on.
(check the pic for more info)
 The Marquee tool: with it you can, put pics in circles, rectangles, delete parts of layers or pics that you don't want and so on.
Right click on the Marquee tool, select the elliptical shape and drown a circle on your pic and then click on Refine Edges on the top bar.
http:// i.imgur.com/jKh18aO.png

https://i.imgur.com/5KWtXTU.png
Add borders to your siggies, it's simple. Just put a layer on your siggy, fill it with any color, if the siggy is dark then fill it with a light color, with bright siggies do the opposite. After making the rectangle on the black siggy press the "CANC" button your keyboard check pic.

If you want you can change the mode of the border in to overlay or anything also to make it look like it is a part of the pic.
https://i.imgur.com/jfXu67R.png
https://i.imgur.com/JUO9UMk.png
THE LASSO TOOL: I use the lasso tool if I want to extract just a particular thing out of a pic. It is a simple tool, you just need to select the lasso tool, then outline the part that you want to extract from the pic and then press on Refine edges. Check below.
I bordered the two kids, because I don't want the other parts of the pic.
And this is what I get.


The Polygonal and Magnetic Lasso Tool to works in the same way. They are more precise. Just click our the object that you want to take out from the pic and when you are done do a double click and then click on refine edges. Since I don't have much time I'm not gonna show them.
QUICK SELECTION TOOL/BRUSH: using it, it's very easy, select it. On the top par you can see that there is:
A brush with a plus symbol: select it and go with it on the part of the pic that you want to keep.
 A brush with a minus symbol: if you by mistake outlined a part that you don't want, or you want to redefine the edges more select this brush and pass it on the edges or the areas that you want to delete from the selection.
 A dot with a number: with it you can change the size, hardness and softness of your brush.
Once you are done press on Refine Edges.

 CROOP TOOL: by clicking on it you can increase the area in which you are working or just crop the not needed space around your siggy or tags. E.g. when I do tags I work on big documents, when I'm done, I croop the not used space.
 EYEDROPPER TOOL: this little tool is useful when you want to use a color from a pic as background, or when you simple forgot the "PS code number" of the color that you have used in another edit. How it works. You just need to click on it and then you have to click on the color that you want to use for your edit. The color will be set has your Foreground color and you can use it. It's simple.
 BRUSH TOOL: with this tool you can do many things. Let's know them step by step.
Brush as Brush: you can select any brush and designs what you want. Dcor your siggies and so on. Since the default brushes are not that creative, you can download many brushes from internet websites and then load them in your PS.
Brush as Eraser: you can use the brush as an eraser, but to do so you have to put a layer mask on your Layer(click on this button  which you can find on the bottom part of the layer bar ) then click on the brush tool, select the size, the opacity and the flow as per your choice and then go on the parts of the image that you want to delete. If you by change have deleted a part that you don't want, nothing to worry, just change the color of the brush from black to Write and pass the brush on the part of the pic that you have accidentally deleted, it will be automatically restored.
 PAINT BUCKET TOOL: with this you can fill the layers with any color. Select it, select the color and click on the empty layer and it will be filled with the color that you have selected. On the top part there is a bar id you change the mode from Foreground, which means a solid color background, to Pattern, you can select any pattern from your pattern box and fill the layer with a pattern.
GRADIENT TOOL: If it is not visible. Right click on the Bucket and select it. With this tool you can marge and use gradient in your siggies.
As merger: put a Mask layer on the pic then select a Back to white gradient and drawn little lines from the edge of the pic towards it center.
As Gradient: put a new layer on your siggy, then select the required gradient and drawn a line on the blank layer and it will be filled with the selected Gradient you can change the mode of the layer and use it fit things in your siggy. E.g. I use it when I have siggy which has one side more lighter than the other one. I put a black and white gradient or other colors combo, one dark and one light. Then I put them on lighter or soften mode or even overlay. In this way my siggy looks homogeneous.
 ERASER TOOL: I don't think I need to explain what you can do with it. The name itself says it all.
TEXT TOOL: again the name says it all, by selecting this tool you can type anything on your banner.
And I think I have kinda explained you everything that you need to make a good siggy. Let e know what you want to learn and if get some free time I'll make or write a short tut for you guys.
For any other query feel free to PM or Scrap me 😃
-do let me now if it helped you-


H i! Welcome to my first-ever shop on A/S forum. My name is Leena (without double/triple A's :p ), a self-critical person from Egypt living in...
Made by sevenstreaks I am Pryanka known as Prii on IF. I am 34 years old from UK/US. My Birthday is on 12th March. My favorite shows are Faltu,...
W E L C O M E to W H A T I M A K E? • Signatures ~ Book Cover ~ Banners ~ Tags ~ Gifs ~ VMs \\ Both non animated and animated stuffs// C O P Y R...
M E R A K I , a Greek word meaning to do something with soul, creativity, or love; to put something of yourself in your work. W E L C O M E TO W...
Hello all and welcome to Saher Mrina's shop! This is our first collab creation gallery since both of us are now busy but still want to be...


 Asian Shows
 Cricket
 Anupamaa
 Kabhi Neem Neem Kabhi Shahad Shahad
 Kyunki Saas Bhi Kabhi Bahu Thi 2


112