
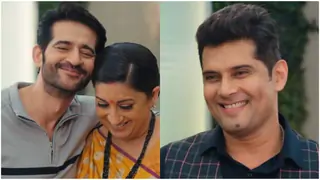
Yeh Rishta Kya Kehlata Hai - 07 Sep 2025 EDT
NASEEB vs BADNASEEB 7. 6

Bigg Boss 19: Daily Discussion Thread-8 Sept 2025| Teams DT note P.58
Yeh Rishta Kya Kehlata Hai Sept 8, 2025 Episode Discussion Thread
BHAGODI MAIRA 8.9

「 ✦ Font-tastic Voyage Graphic Contest ✦ 」

Anupamaa 08 Sept 2025 Written Update & Daily Discussions Thread

Kareena Kapoor in London/ Birmingham for Malabar Gold and Diamonds

BALH Naya Season EDT Week #13: Sept 8 - Sept 12
The ba****ds of bollywood trailer


Someone asked me to make a Tut on making these type of banners, so here you go.
WARNING: WITH THIS TUT I CAN HELP YOU IN MERGING PICS, MAYBE IN SHARPENIGN TOO, BUT I'M NOT GOOD WITH THE COLORING PROCESS, BECAUSE I ALWAYS MASS UP THAT PART.
How to make banners for IF - 728*90
1 open a new document in your PS width 728 and height 90
2 open the image that you want to add in the banner.
3.1 Okay the next thing is really important. Decide how you want to use the image:
3.2 if you want the image as it is, then you have to do like this
Image - Size - and just change its height to 100 or 110. It depends on the image.
Just like I did for this image.

This is when I have dragged it in the banner.

POINT: I had kept the background white, because my pictures have a light background, which goes well with the white color.
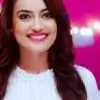
3.3 If you want to use just the face of the person, then before reducing the size of the pic, crop the unwanted parts, this will make the face bigger and more clear.
See the pic below.

^ I wanted to keep just Sonam, so I cropped the rest, always keep some space around the "obeject/person", it will help you during the merging process. Then I changed the image's size.

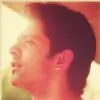
I did the same with Hritik's pic https://i.imgur.com/qvwGMhX.png
Do step 3 for all the pics and drag them in the banner document. Adjust them asper your likes. This is what I get after adding all the needed pics in the banner document.

4 Now start the blending process. Start from the images that are at the top. I started with the central one. First I merged the left side and then the right one, see the pictures below


While merging one of the pics I realized that it doesn't go well with the other ones, since it's of a different color, more dark then the others. So I changed it with other pics which goes well with the bright theme.

When you have done blending all the pics together and you are satisfied with the result.
This is what I have

Let's start the sharpening process: this is not compulsory, there are other methods too, but I use this:
5.1 merge the pics together, press Ctrrl+shift+E on your keyboard
5.2 duplicate the banner, now you have two layers, original one and copy
5.3 select the bottom one, go to filters, sharpen, smart sharpen.
5.4 select the top one layer, go to filters, others, high pass. This layer will turn from a colored layer to a gray layer.

5.5 change the mode of the gray layer from normal to overlay and decrease the opacity and fill percentage as per your likes.

5.6 merge the two layers together.
Coloring process, you can start from where you want. But I normally follow these steps:
6.1 add a Level adjustment layer. Works with the colors
6.2 add a curve adjustment layer and increase the luminosity of the banner

6.3 add a Gradient Map adjustment layer. Normally Black and white or any other light color with black works well. The gradient should be decided accordingly to the color of your pic. I don't have much colors in my pic, the dominate is blue, so I went with a black and yellow color to soften it.

6.4 Add a Photo Filter adjustment layer. The warm filter works always well. If not then go with the tint, select a color which is more present in your pic and go with it. Try to change the mode of the layer, sometimes you get lovely effects by just change the mode of the layer.
65 Add a texture. Drag a texture on the top of your banner and change it's blending from normal to screen. If needed decrease the opacity and fill percentage
6.6 Add any text. Try to change the blending mode of the text layer to get the right effect.

YOUR BANNER IS DONE.
8. Save it as JPEG.


H i! Welcome to my first-ever shop on A/S forum. My name is Leena (without double/triple A's :p ), a self-critical person from Egypt living in...
Made by sevenstreaks I am Pryanka known as Prii on IF. I am 34 years old from UK/US. My Birthday is on 12th March. My favorite shows are Faltu,...
W E L C O M E to W H A T I M A K E? • Signatures ~ Book Cover ~ Banners ~ Tags ~ Gifs ~ VMs \\ Both non animated and animated stuffs// C O P Y R...
M E R A K I , a Greek word meaning to do something with soul, creativity, or love; to put something of yourself in your work. W E L C O M E TO W...
Hello all and welcome to Saher Mrina's shop! This is our first collab creation gallery since both of us are now busy but still want to be...


 Fan Fictions
 Cricket


112