Hello Frnds...i dunno whether its posted b4 or not...
i found it on Google...so thot of posting it here...
Make ur Photos Look Hipster wid PS
Open a photo into Photoshop.
First, we'll create a bloom effect to make it appear more sunny. Before we apply any filters, convert the layer to a Smart Object. Right click on the Background layer then choose Convert to Smart Object. Now that your layer is a Smart Object, you can apply Smart Filters which are basically non-destructive (settings changeable at any time without any loss in quality) version of filters.
Duplicate the layer (Ctrl/Cmd+J or Layer > Duplicate Layer). Select the top layer; this is the layer we will be applying the bloom effect to.
Go to Filter > Blur > Gaussian Blur then apply a Gaussian Blur with a setting that blurs the image like shown below. You should still be able to make out the shape of the objects. Click OK.
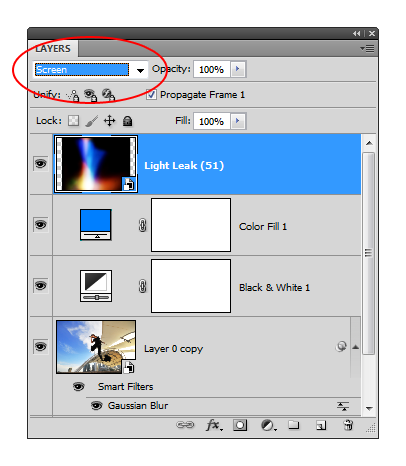
Double-click on the

button to edit the filters blending options. Change the mode setting to Screen.
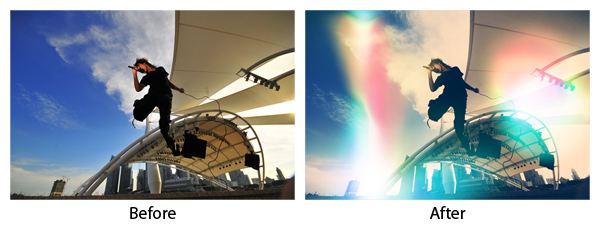
You just created the bloom effect! Unfortunately, it looks a little fake and there are glowing edges around the black areas. Some people like it like this and some don't. In the next step, we'll show you how to make this bloom effect more realistic. You can skip it if you like the dramatic bloom effect.
In this step, we'll show you how to make the bloom effect more realistic. This step is optional and you may skip to step 4 if you want to keep the bloom effect strong. To make the bloom effect more realistic, we're going to modify the blending options for the layer to tell Photoshop to keep the bloom effect to the bright areas but hide it in the dark areas.
First, delete the filter mask because we won't be using it. This is just to keep our layers clean. Right click on the filter mask then choose Delete Filter Mask.

Right click on the layer then choose Blending Options.
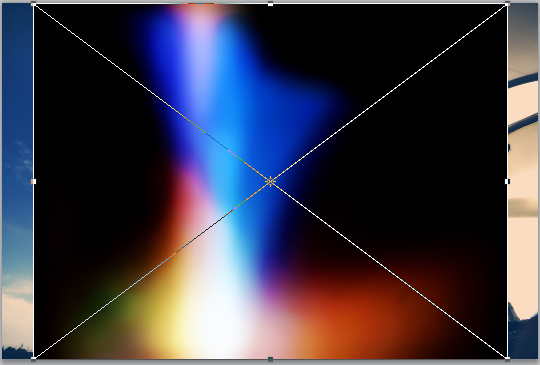
In the Blending Options, move the black input slider to the middle like shown in the image below. As you move the input slider, the number on the This Layer property will change. You can tell when it is in the middle when this number is 127.
While holding down the Alt key on your keyboard, click and drag the black input slider towards the very right like shown in the image below. Click OK.
![animation[3]](https://photoshoptutorials.ws/images/stories/Hipster-Photo-Effect_131F/animation3.gif)
Here's what the image looks like now. What we just did in the blending options made the layer visible according to the brightness of the layer. This means that the bloom effect is only visible in the brighter areas of the photo.
We got the bloom effect so now we are going to add an effect gives the photo a low dynamic range look. Start by adding a Black & White adjustment layer (Layer > New Adjustment Layer > Black & White. Don't worry about the settings, we'll change this later.
Change the blending mode of the Black & White layer to Overlay.
In the Adjustments palette (Window > Adjustments), you can change the settings of the black and white layer. The Auto button works pretty well for getting good results.
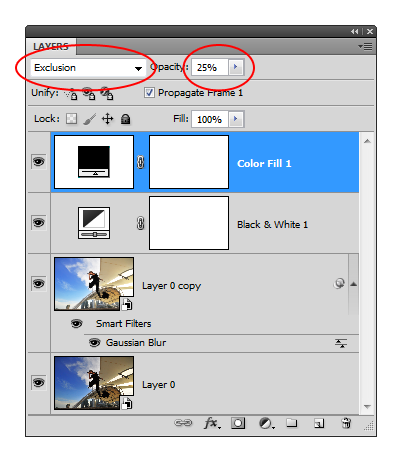
Now we are going to add a retro color effect to the photo. Start by adding a Color Fill adjustment layer (Layer > New Fill Layer > Solid Color). A window will appear asking you to select a color. Don't worry about the color for now; just click OK. Change the blending mode of the layer to Exclusion then reduce the opacity to 25%.
Double click on the Color Fill layer to edit the settings.
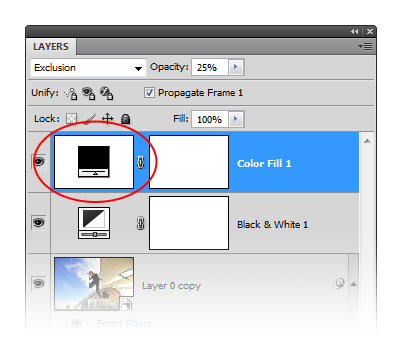
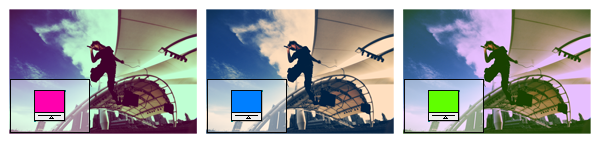
Pick any color you like. You can get a lot of different color effects depending on the color you pick. The most popular color people use is #007fff.
Here's an example of different colors you can use to create different color effects.
open a texture...drag on the pic..
First, change the blending mode to Screen.
Position and transform to your likings.
u can add more light textures...
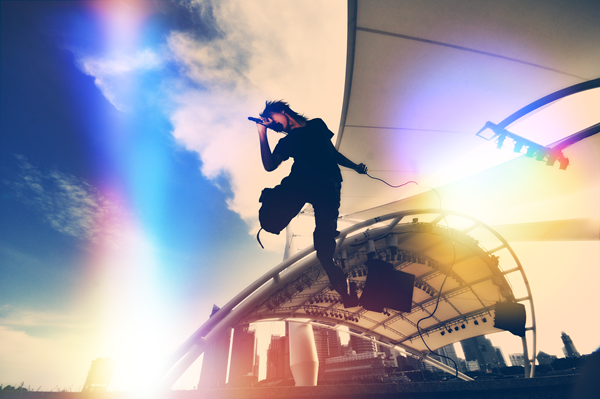
Here is ur final results...
Luv,
Juhi


 CID
CID
 Geet - Hui Sabse Parayee


850