


Posted:


Help with how these siggies are made. Please. 🥱

Bigg Boss 19: Daily Discussion Thread - 28th Nov 2025
Bigg Boss 19 - Daily Discussion Topic - 29th Nov 2025 - WKV

VIDYA KA PLAN 29.11

Deepika Padukone’s sister Anisha is getting married
PARTY FAILED 👎30. 11
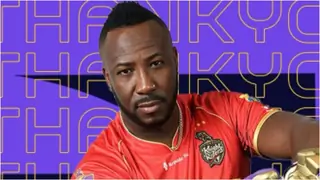
Ashnoor Kaur is evicted due to violence
Taniya did right not eating Pizza. Self respect is more important.

CID2 confirmed to go OFF-AIR, likely to return with 3rd season!
Ahaan and Aneet new content- won GenZ icon of the year
What's wrong with team Dhurandhar? Such lousy promotions man!
Paneer Uncle s wish is fulfilled

🏏S A tour of India, 2025: India vs South Africa,1st ODI-- Ranchi🏏
Gehra Hua - Dhurandhar
Are you interested to watch Dhurandhar?
What is Ananya wearing in TMMTMTTM Title Song?
Gustaakh Ishq review and box office

Vachan dile tu maala: new show Pravaah

Mannat…Episode updates my style
Ranveer gets brutally slammed for mocking Chavundi Daiva
Originally posted by: Sevenstreaks
I m looking for a psd in this colouring
Can anyone help me with this ? 😊
Originally posted by: MeenuCrazyPanda
Help anyone?
thanks radhi😃Originally posted by: Radhikerani
For this: https://i.imgur.com/XCQscqm.gifIt's an overlay GIF. You can try googling them (circle/circular overlay GIFs should do it). 😃For this: https://i.imgur.com/1jyqid9.png-> There's some sharpen-> You can try applying a saturation mask, and shift lightness of individual colours (mostly red & yellow) towards 180. Do I make sense? 😛-> Best way, get hold of whoever made this; they're the best source. 😳PS you can always use a PSD. 😃
Originally posted by: Radhikerani
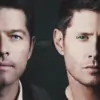
This: https://i.imgur.com/CkvQHn9.jpgI'm just guessing what the maker did, for comprehensive info you'll have to contact them. :D1. Some kind of a pixel-pattern waala texture was placed in the beginning.2. Use the Marquee/Line/Rectangle Tool to divide the canvas into half (the white line through the middle)3. Place the big picture on the right first so that it covers the entire breadth. Follow it up with te bottom right pic (longer one). Fill up the remaining area with the two other pics. Your right half is done!4. Place both of the pics on the left in the pallete. Use the Marquee tool to select the white rectangle thingy in the back.5. Make sure you have your upper-left pic ka layer selected, then press ctrl+shift+i (this inverts your Marquee selection) and press delete. Repeat this for the other pic too (this will crop the parts of the two pics outside of the white rectangle),6. Now use the Marquee/Rectangle tool to make the orange rectangle ka shape and fill it with the colour.7. Then add a colouring, enter the text and you'll be done.This: https://i.imgur.com/cGpiFqZ.jpgHoney you're already good with the blending stuff so just imagine this is 3 rectangular sigs stacked together in a larger canvas.You can use the Rectangle/Line toolcs to create the border kinda things b'w the 3 parts. For the rectangles set the fill colour to some grey shade.When you're done with it, set the layer mode to screen (this will give you the semi-transparent effect).This one: https://i.imgur.com/7nGNXw3.gifI'm assuming (for the sake of whoever visits this page next) that you're a beginner in animations (I know you're not). 😆-> You create your canvas, and open all the involved GIFs (6, here) in a separate file.-> Now concentrating on the BG waale GIFs. You select all the frames, copy them and paste over your main document. Enclose layers of both the GIFs in separate groups and name them comprehensively.-> Adjust their positions, and use the layer mask & brush tools to merge them (check out our amazing tutorials on IF to know how exactly we do that 😃).-> Now you're done with the BG, so use the Ellipse Tool to create 4 circles exactly where you want to place the GIFs (all 4 may/may not be in the same layer).-> copy and paste the 4 GIFs that are inside the circles onto the main canvas and adjust their size, position etc. such that they are right over their respective circles. Now (you should have all of them in groups by now, place a quick mask over all 4 groups using the icons below the layers panel).-> ctrl+click on the first circle. This leads to the appearance of a marching ants border around the shape. Now press ctrl+shift+i to invert the selection. Now, the border selects everything but the circle.-> Now select the brush tool and the thumbnail of the first GIF layer. Set the foreground colour as black and brush off the entire canvas. You'll see the parts of the GIF outside the circle disappearing.-> Repeat this for the other 3 GIFs.-> Now go to the circle waala layer(s) and apply stroke in white colour. You'll get this effect then.-> Now apply colouring, PSDs and texts and you'll be done!Hope that helps! Please feel free to post here/message me directly in case you need more help or any clarification on these! 😳
Originally posted by: MeenuCrazyPanda
Is anyone else facing this problem?
I am not able to see India Forums Banners in Chrome..I tried with other browsers and I am able to see them.. But not in Chrome.. In Chrome its blank..Here are the screenshotsChrome:FireFox:


This thread is "Creations Exhibition #5 " where you can show off your latest work. And it is for everyone including members who have a...
Hello all and welcome to Saher Mrina's shop! This is our first collab creation gallery since both of us are now busy but still want to be...
Are you new to Avatar and Signature Shop Forum? Then this is the right place to know about this forum and it's activities. Next few posts will
Hey there! I'm Leena, and along with my trusty sidekick (my PS :p), and give you a warm welcome to Arcanum Tutorials. After a lot of...
Anim a t e d N o nAn i m a t e dR e qu e sts Wanna get your request done without waiting for too long? Well then this is the place to place your


 Book Talk
 Anupamaa


745