Tutorial# PataNahi 🤡
Blending more than two gifs like normal siggies
So Ankita Mata (Hue.Splash formerly known as vampire-queen) after seeing my upar wala Olicity siggie was like "Bata kaise kiya" so here am I, giving a tut.😊 A bit long, so if you don't have time baad mein aao.
Step-1 DON'T PANIC.
Yes, this is many gifs in one. Yes, this is going to be more time consuming than normal pic wala siggie. Apart from this, there is nothing difficult about animated
siggie. Treat each gifs like a picture and you will have an idea as to where to place them, text, color, texture, etc etc. What you need to keep in mind is-
- gifs from same scene or different?
Just like non-animated signature, if you are picking gifs from many different scenes chances are it won't look nicely merged. Gifs move, pics don't,
so another problem. Same scene wala gifs will have same background, same color, also more feels.
- How many frames?
Keep in under 30, even 30 is more but eh... I generally don't go above 20. You need to keep in mind the final size and PS hanging too, especially if it's an
ancient PC. 🤓
- How many gifs?
Depends upon you. For beginners two is good, for advanced 4/5/6. Don't make it look too crowded, also keep space for text too so that it don't overlap the gifs.
TYPE OF ANIMATED SIGNATURES
Two ways you can make animated siggies- one is by using Template. You can do a google of Gif template and see different shapes of them. I recently tried some.

Another is merged gif signature. This Tut is about the second one, obvio.😛
Step-2 make the gifs
Anki asked me for Olicity wala but for this I am using Beyhadh ka one scene. The procedure is totally same. Start first by making gifs (file-import-blah blah).
For this one I made 4, then erased frames so that they are all of same number of frames (15).
** open in new doc for bigger size
Step-3 Open new doc
Ctrl+O, new document and then duplicate the frame until they are of same numbers of your gif. Now Paste them one by one, place them accordingly.

Use a soft brush and erase the edges and copyrights. God's sake, erase the copyrights, they are hella irritating! If you can't erase them cover them with texture or do some jugaad but erase copyright. You can see in mera wala the bottom CR is still there, don't worry it won't be in the end.
Now it looks like this.
Step-4 Color!
This scene is laal ishq, literally, so not doing much. Removed all yellow and increased black, the adjustments are below. Texture, some jugaad to hide the CR.
Then text, since I am rubbish with text a very basic one for this scene.
Now adjust the timing (My setting .13/.17) of frames, save it, and done!
Edited by .Avengers. - 8 years ago


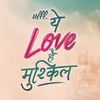 Ufff Yeh Love Hai Mushkil
 Suggestions / Comments
 Current Affairs


357