Tutorials

CONFUSED SOULS 12.12
KIARA IN DANGER 13.12

Akshaye Khanna is the highest grossing actor of 2025!!!
Critic Roshan is back with another review of Dharundhar!!
What an incredible comeback by Ranveer Singh!!!!!
Dhurandhar emerges a BLOCKBUSTER
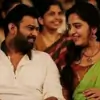
Lets talk about Tanya

Next season’s contestants - speculations
Lionel Messi in India. Shah Rukh Khan & Kareena to meet him
17 years of Rab Ne Bana Di Jodi
Originally posted by: -chamkilli-
Oops forgot to post the download link for psd # 77
Psd # 77 - Ajab Prem ki Ghazab Kahani
- Should work on all the scenes from this movie
- Adjust the curves layers if needed to.
- Like this post if downloading.
Psd #78- Yeh Jawani hai Deewani
- Should work on most scenes from this movie
- This is a pastel psd without whitewashing and should tone down the reds, oranges and yellows.
- Adjust layers if needed to.
- Like this post if downloading.
Paper texture


TUTORIAL#5
First Tutorial Link:-How to make an animated gif without Photoshop?
Second Tutorial link:How to make a blinking text effect without Photoshop ?
Third Tutorial Link:How to make a banner without Photoshop ?
Fourth Tutorial Link:How to make a basic siggy with Fotor
Fifth Tutorial Link:How to merge two pics in Photoshop CC

Hello everyone,
After almost four months I am posting a tutorial,and for the first time this tutorial is not using any online software,instead it is a tutorial using photoshop.I know that there are many tutorials of merging pics using photoshop but this is with CC,not including any 2,3,or anything.
Step 1:
Click on file,then new,or CTRL+N,and then choose any size,I usually choose 500*400,but you can choose any canvas size you feel comfortable with.
Open a pic,by going to file again,or CTR+O.

Step 2:
Drag the pic from the fourth box (right side),which is the layers section.You need to drag the picture to the canvas,and then go the free transform from 'edit' and change the size accordingly.If you are done with changing the size,then press enter for bringing another pic.

Step 3:
I am merging two pics,so the first pic (srk one) has been dragged to the left side.

After this you can,bring another pic,and do the same like you did in the first one,but in this one you need to erase as well,so that the other pic is also visible.
(NOTE:You have already used the free transform thing,and hence,the size of the pic is also changed accordingly)

Use the eraser tool,and erase the parts,which are not needed.
The pic will look like this:

You can add effects or add psds further,if you want.
I've added my own effects,and also psds,so therefore it looks like this:

Shorter Version with more contrast:

um,i think this should be enough,though cs users are really less as there are better versions.
But,if someone accidentally downloads this,and has used my method,then you can always pm me,and ask me any sort of problem regarding this.And lastly you can always use this method in any version of photoshop.If you wanna learn how to apply a psd,then feel free to pm me anytime.
Love Always,
Rhea
Originally posted by: BornThisWay
Free to use
Credit isn't necessary but appreciated.


Welcome to A/S CC #2! A place to discuss graphics making, life, muse (or the lack of it) and any random topic. Also anyone can request a critic...
Hey friends Welcome to Questions Queries Corner Please post all your questions queries here instead of making new topics. If any "help" topics...
This thread is "Creations Exhibition #5 " where you can show off your latest work. And it is for everyone including members who have a...
Hello all and welcome to Saher Mrina's shop! This is our first collab creation gallery since both of us are now busy but still want to be...
Are you new to Avatar and Signature Shop Forum? Then this is the right place to know about this forum and it's activities. Next few posts will


 Seher Hone Ko Hai
 Cricket


71