Post All Tutorials Here #2 - Page 77

Created

Last reply

Replies

1k

Views

207.2k

Users

131

Likes

3.8k

Frequent Posters

Medha. thumbnail
14th Anniversary Thumbnail Sparkler Thumbnail + 4
Posted: 13 years ago

How to Stack Avi's

Hey guys. For a while, some people have been asking me questions on how to stack Avi's in Photoshop so thought to make a quick tutorial on this. Hope this helps everyone out. :) And yes, if you're going to use this tutorial anywhere else, please credit me. I've spent an hour gathering all this and would really appreciate if you'd credit me. Thanks.
1. You'll always need to have your Avi's ready first. That's a must. One more thing you need to keep in mind while making these Avi's, is that the number of frames for all of the Avis have to be the same. For example, if your first Avi has a total of 100 frames, the others will also have to have 100 frames. Nothing more, nothing less. If there's a difference between the numbers, your Stacked Avi will not come out correctly, so be sure of that. To know the number of frames, look at the bottom of screen. You'll see a box which says 'Animation (Frames)'. Slide the slider all the way down and the number of the last frame is your total number, so be sure all the others frames are the same number. 😊
2. Open the Avi's you want to stack together. In my case, I'm going to be stacking 3 Avis, Since I already have my Avis ready, I'll open my 2 Avi's first. If your Avi's aren't saved, save them. :) I'll always prefer that just so that you don't end up losing all that hard work. After you've saved it, open your Avis.
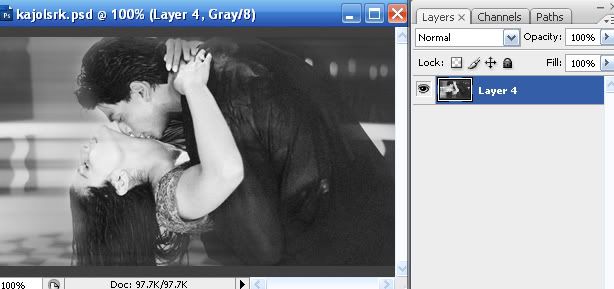
As you can see, I've my 2 Avi's opened like that. It should look something like that. :)
3. Now, you will have to open a new document. To do that, you can either go to File > New... just do Ctrl + N. Now you'll see this little box pop up. Now here's the thing. If you want to stack your Avi's vertically (up and down), the 'width' is going to be '100' and the height is going to be the number of Avi's x 100. For example, since I have 2 Avi's to stack, my height is going to be 200. So if you want to stack 3 Avi's it'll be 300, 4 will be 400 and so on. And if you want to stack your Avi's horizontally (side by side), your height is going to be 100 and the width is going to be the number of Avi's x 100.
And now, click 'OK' and something like this should pop up:
4. Now, it's time to move the Avi's to this document. :) Go to your first Avi, the one you want first and do this:
See how all your 'Frames' are now selected? Well, now you'll have to select all your 'Layers' too. To do that, there's a simple way. Do this: Alt + Ctrl + A.
See how all the 'Layers' are selected now? Now here's something I will suggest. Once you've selected all your 'Layers', do this: Ctrl + G. All your layers are now going to be grouped. This will really help you later. :) Now the main task. You see that little arrow on the right of the 'Animation' box? This one:
Click on it and then select 'Copy Frames'. Now, go the new document that you had opened a few minutes back. Go to that same arrow which I showed you above and now select 'Paste Frames'. A little box is going to open up and then select 'Replace Frames' for this one.
Click OK.
5. See how the first Avi has now been pasted here? Repeat step 4 with the 2nd Avi too, but when that box pops up, select 'Paste Over Selection' and click 'Ok'.
See how the 2nd Avi is now over the 1st one? Well, now you have to move it below the 1st one. :) Now, select the 2nd Avi group and do this: Ctrl + T.
See how the 2nd one has been selected? Now, with your cursor on the Avi, drag it below the 1st one and press enter once you're done.
See how the Avi's are stacked now? That's it! That's the only thing you gotta do. Now, do the same with the other Avi's and tada! You're done! Add any more effects you want and then, just save the Stacked Avi you would normally! That's it! Hope this tutorial helped you all and if you have any more questions, feel free to PM me. I'll be glad to help you out! 😃
-Medzi-

saher_90 thumbnail
17th Anniversary Thumbnail Trailblazer Thumbnail + 4
Posted: 13 years ago
@ Priya: thanks dear n lovely psd:D
@ zeenat: thanks alot dear:)
..oneOone.. thumbnail
19th Anniversary Thumbnail Sparkler Thumbnail + 5
Posted: 13 years ago
Easy brownish coloring tutorial
by ana
(cool_SK)


1. Open the pic you need to make image of
i choose the classic pic of SRK-Kajol


2. I just add a lil border and duplicate the layer to make a radial blur effect to make it look dreamy
to add radial blur effect
Filter>Blur>Radial Blur
Blur Method>Spin
Quality>Good
Amount>50
how can use any amount how much radial you want it

then just take the erase tool and low the opacity of the layer so you can easily erase the part of the faces and body of the characters making the background look dreamy

ok after i m done with this it looks like this


3. Now you need to convert the mode
Go to Image>Mode>Greyscale

there will be a pop-up asking if you want to merge
Merge it and then it will ask you to use black & white but Discard it
So now my image is like this


4.Now again you have to go to
Image>Mode>Duotone

Type:Duotone or tritone whatever you want
it depends upon how many colors you want in your siggy

I am choosing Tritone

Ink1: Black
For Ink2 & Ink3 : Double-Click the white color box


[Book: Select Trumatch...thats the last option]

select any color you want, but as i am trying to have a brownish kind of color i am using
TRUMATCH 8-a7 & TRUMATCH 7-b6

(you can also copy this and paste it in the written box after to get this color direct without getting into book)

So all in all my colors are

Ink1: Black
Ink2 : TRUMATCH 8-a7
Ink3: TRUMATCH 7-b6

5. Click on the Curves option beside color
and give a lil curve to give the image a deep and glow color

I am using this setting for Ink2 color


and this setting for Ink3


So my image is like this now


6. add textures or text you want to

7. In the end the problem is you wouldnt be able to save it as jpeg or gif or even png
coz the mode scale dont allow us that

Go to Image>mode>select RGB color

So over all my siggy is like this
just for this tut i made it simple


Note: to all a lil coloring other than brown
then do this step-7 after step-5
so mine turned out like this


{the pic i send before was a way too much hard, this one is simple}

do tell me if it helped or not

take care
luv ya
ana
pratsy thumbnail
16th Anniversary Thumbnail Stunner Thumbnail + 4
Posted: 13 years ago
loved d psd priyuuu

ana...thnks 4 sharngg

.infinite. thumbnail
14th Anniversary Thumbnail Sparkler Thumbnail + 4
Posted: 13 years ago
Made a PSD
-Freebie :)
-credit is not necessary

Download link: http://fatz00.deviantart.com/art/Demi-lovato-PSD-by-Fatz-PSD-2-264026641

-Akriti- thumbnail
15th Anniversary Thumbnail Rocker Thumbnail + 6
Posted: 13 years ago
Nice tutorials cool_sk
and lovely PSD fatz 🤗
ruky786 thumbnail
18th Anniversary Thumbnail Trailblazer Thumbnail + 4
Posted: 13 years ago

Originally posted by: -SamPari-

(C)Angelic-Design nw known as bloodlustdesigns

DON'T CLAIM AS UR OWN..

DON'T DISTRIBUTE AROUND OF I.F

Making texture

My simple way in PSP.

1. Open up a reasonable size layer... Mine is 500 x 400

2. Fill it any colour u like...

(Image below)

3. Get your paintbrush out and randomly paint random line or swiggles of different colours on the layer,

(Image below)

4. Then go to adjust blur and motion blur and repeat at least one or two more times until its texture looking.

Mine come out like this..


That Ur layer/texture and now u can use it...

my result on using it on a pic

too get this result below paste as a new layer on the pic then go to

layers>properties>lighten or screen or Darken ..

U can change the opacity


Nuff Love SamPari xx


OMG I read ur tut and I did one myself and it wasnt that bad!

Here's the texture i made lol😆


Here's my result😆


Untolddreamx thumbnail
14th Anniversary Thumbnail Explorer Thumbnail
Posted: 13 years ago
-KaJenAbhiya-

Thanks fOr The wOnderful tutorial its really helpful for biggeners ...

cool_SK

you too made a lovely tutorial for us...

Fatz n saher_90

LOvelY psds...

ruky

very nice work sista...
.infinite. thumbnail
14th Anniversary Thumbnail Sparkler Thumbnail + 4
Posted: 13 years ago
@Aakriti, Juhi, Maya and Pratsy, thank u soo much 🤗
Jenny.. thumbnail
15th Anniversary Thumbnail Stunner Thumbnail + 3
Posted: 13 years ago

so herez my new PSD 😃
credit me if used :))

dw link
http://jenzcreationz.deviantart.com/art/Fascinating-PSD-264185171

@ saher di i used ur PSD here :))


lol i used in many more but not posting here 😆 herez the link if u wanna se more :)🤗
http://www.india-forums.com/forum_posts.asp?TID=1919054&TPN=14
Edited by -Arti4ever- - 13 years ago

Related Topics

Top

Stay Connected with IndiaForums!

Be the first to know about the latest news, updates, and exclusive content.

Add to Home Screen!

Install this web app on your iPhone for the best experience. It's easy, just tap and then "Add to Home Screen".