
Mannat Har Khushi Paane Ki: Episode Discussion Thread - 36

KRISH AT THREAT 22.12
BRAINLESS KRISH 23.12

Ranveer Singh surpasses Ranbir Kapoor

The Post leap episodes have been very disappointing
Ranveer walks out of Don 3
Awards Navri actually deserves
Mihir tulsi reunion bts??
Out now TMMTMTTM song - Saat Samundar Paar
Mithali n Hritik married 😂😂
New promo: Noyna sees Tulsi
Prediction - Tu Meri Main Tera Main Tera Tu Meri

🏏India Women vs Sri Lanka Women, 2nd T20I SLW tour of India 2025🏏
New fiction coming soon

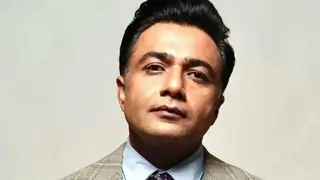
The Star With Sparkling Smile:: Aditya Srivastava AT # 26
Originally posted by: Preet.Kc
Tutorial for Animated Texts with the Option Gradient Overlay 1) Open a new transparent document of any size
2) With the Text tool type any text you want "I'm writing Arnav and Khushi"
3) Give to your text the color that you like the most? I'll keep it black
^^I had named the Layer T1 so it will be simple for me to explain what I'm doing with each Layer.
4) Now with the Layer "T1", which is the only one Layer that you have, selected open the blending options (to open blending options you can click with the right side of the mouse or click on the butter (fx) which is on the bar under the layer box)
5) I have given a drop shadow to the text, I prefer the settings that you see in the picture but you can change them accordingly to your taste
6) I have put a little outer glow to the text, here for the outer glow it's better to keep the opacity on 100% it looks more visible and clear if you use the white color (fff)
7) In Gradient Overlay select the color combination that you like the most, or just make a new one, I'll go for the blue, yellow, blue one. To select the color combination that you already have in your PS just click on the arrow and you will see the basic options that you have.
8) Do the following settings:
Adjust the Opacity the way you like it the most, mine it's 47%
change the Style from angle to linear
Set the Angle to 0
The Scale should be in a way that only the word "and" it's in golden, I'll put a 78%
Click okay and you will see something like in the picture.
9) Duplicate the text layer (T1) for just once, I had named the new layer as T2
10) Hide the first layer and with the second layer visible go to the blending options, and in the gradient overlay do the following changes.
^^ you need to adjust the colors in a way that only the word Arnav is in Golden while the rest is in Blue.
11) Adjust the Scale in a way that the entire Arnav word is in golden, it's better if you put the Sclae to maximum before changing the colors setting, so you will see the changes fully while adjusting the colors, but since i forgot i'll do it leter 😆
12) Now your work it's almost done, select the layer T2 and duplicate it, after you have done it, select the new Layer that you have just created, the copy one, mine it's the T3 and in Gradient Overlay just uptick Reverse and voila your work is done, now even the word "Khushi" is in golden.
Now you just need to animate your text in the way that you like the most.
To animate the text, go in the timeline box, Duplicate the frame for 2 times and in each fame make just one layer visible and hide the other two.
You can get two types of animated text
This one
If you animated them in the following order :
Frame One - Layer T1
Fame Two - Layer T2
Frame Three - Layer T3
But since I love a more a linear affect I have done this
Frame One - Layer T1
Fame Two - Layer T3
Frame Three - Layer T2
the difference it's really little but is you have a good eye you'll be able to capture it.
Once you are satisfied with the animation crop the unnecessary space and save the text with the option "Save for Web and Devices"
Hope it helps 😊
I'm really the worse person in the world when it comes to explain, i got things but i don't have the capacity to explain them


its willgrace


This is a thread where you all can share everything anything, be it be a Tutorial, PSD, Suggestions, Textures, Animations, etc Try and avoid too...


 Hindi TV Shows


850