
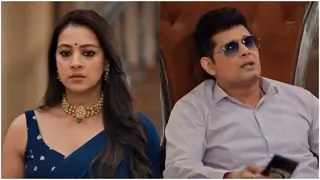
Mannat Har Khushi Paane Ki: Episode Discussion Thread - 36

BRAINLESS KRISH 23.12

Ranveer walks out of Don 3
Awards Navri actually deserves
Out now TMMTMTTM song - Saat Samundar Paar

Mihir tulsi reunion bts??
Mithali n Hritik married 😂😂
New promo: Noyna sees Tulsi
Prediction - Tu Meri Main Tera Main Tera Tu Meri
Pari : I'm sorry. I miss you mumma.
Hrithik Roshan pictures at Eshaan’s wedding today

New fiction coming soon
Dhurandhar Part 2 Likely To Move Forward

🏏India Women vs Sri Lanka Women, 2nd T20I SLW tour of India 2025🏏
How to make a merged gif using Photoshop CS6/CS5?
*Image heavy. 19 pictures that will load.*Step 1: Open up two or more gifs. (I'm going to use only 2 for starters) Make sure the colouring and sizing is done and saved, so it's the perfect colouring you want.
Step 2: Select all the frames of the first gif and copy them. Make sure the frames are the same amount! (learn how to cull the frames here: https://www.india-forums.com/forum_posts.asp?TID=1953236&PID=75753021�)
Step 3: Select ALL the frames in the second gif.
Step 4: Paste the first gifs frames over this. A box will open up, and you press "Paste OVER selection."
Step 5: You will notice that all your first gifs frames have pasted over the second over, so you select the first frames layers and using the move tool, move the entire section. To select all the layers, click on the first layer of the first gif and hold down the shift key and click on the last layer of the first gif.
Step 6: Once you've moved the second gif where you wanted to, then you change your frame animation to "Video Timeline." and it should look like the pictures below:
Step 7: Once that is done, you then select ALL the layers of the gif that you pasted over and go to filtter>convert for smart filters. You'll notice that there is only one layer left and all have moved, well that's what this does, it makes them into ONE whole gif.
Step 8: Then you click on the one you just converted to smart filter and "create a vector mask" or "add vector mask" in the bottom panel of options.
Vector mask tool looks like this:
Step 9: Click on the gradient tool. Make sure the foreground (colour on top) is white and the background (colour in the back) is black.
Step 10: Now, it's time for you to play around with the gradient tool, basically, hold down the shift key and select here you want to clean out the image, if it doesn't look like what you want then press ctrl+z and go over and over until you have something you like.
Step 11: AND you're done. DO NOT convert back to frame animation or anything, but just straight away go for "Save for Web Devices" and save the animation and you're done!
I made this with the entire thing: https://i.imgur.com/bYwLtWt.gif
Note on Step 6: If you do not have the convert to video timeline option, then please see if you have the star and frames on the bottom of your frame animation. It should look something like this (circled): https://i3.minus.com/j5zmA9BXxIhM.png
If you get stuck somewhere, lemme know and I'll be glad to help you guys.
Previous tutorials:
How to stack different number of frames gif: https://www.india-forums.com/forum_posts.asp?TID=1953236&PID=75753021�
How to blend using the clone stamp tool: https://www.indiaforums.com/forum/post/75744446
Saraa.


This is a thread where you all can share everything anything, be it be a Tutorial, PSD, Suggestions, Textures, Animations, etc Try and avoid too...


 Anupamaa
 Health and Fitness


850