


Posted:
Have been really busy these days...
Good to see you guys missed me 😃😳
Since most of you requested tags. Today I am going to show you how to make a tag.
HOW TO MAKE A BASIC TAG
Step One : Go to google and search for VECTOR IMAGES. Say you want to butterfly, type butterfly vector. You will get loads of pictures.
Step Two : Open PS. I have taken 400x400 pixel art board size.

Step Three : Open the vector image file and copy the image into your black file. Then i have cut the image according to my desired shape and applied drop shadow to give a depth. You can add border instead if you like. I prefer border size 1 to 3 not more than that. And often apply drop shadow after the border application.
Step Four : Copy the vector layer and duplicate it. And the add noise.

Step Five : Noise level in both the layers should be different in order to make it sparkly. I have applied Uniform 7 in one layer and Gaussian 7 in the other.

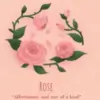
Step Six : Type your text and place it according to your desired location. It is always advisable to colour the text from your image. Take eyedropper tool and select text colour from the image.

Step Seven : Since i wanted to give a different effect to the text i did the next step. This done because you cannot select a text diagonally. With the polygon lasso tool i selected the portion i wanted to change the colour. Then once the selection is done control+c and control+v. Your text will be pasted as in image in a new layer. Make sure you you position it on the text since it might get placed somewhere else.

Step Eight : Go to the image text layer. While pressing control on the layer box select the text image. Then go to paint bucket and fill it with another colour in the new layer. Delete the below text image layer.

Step Nine : Switch off the background layer or fill it with #f9f9f9. [THIS IS MUST for all tags]
Step ten : Go to timeline and create a new layer. Once that is done change the time. I prefer .1 or .2 sec

Step eleven : In the timeline, first layer should have the first image of eid and the second layer should have the second image or copied layer of the eid. Since there is a noise difference it will look like animated. Make sure you switch of the other layer below it or else there will be a difference in drop shadow effect.
Step Twelve : Go to file>save for web (you file will be saved as gif)

Final Product

Hope you have enjoyed this tut.
Please do share your blinkies/tags with me. I would love to see them.
Till then chao... Will come up with texture blending next.


 Anupamaa
 Cricket
 Health and Fitness


850