mistystar thumbnail
Posted: 18 years ago
hi there, due to some tutorial requests, i have made this topic. i will be covering a few of the requests that were asked of me. hopefully the will be as helpful to people as that of my glitter border tutorial.

*** Tutorials that are to be posted ****
1. signature tips

*** Tutorials already posted ***
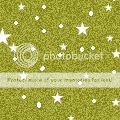
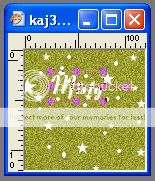
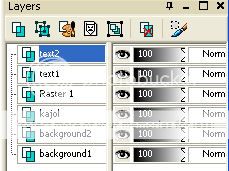
1. animated glitter names inside avis
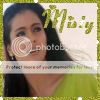
2. animated avis

as i post tutorials, ill list them above, so you will know if i have them.

i am starting on the first tutorial, so please have patience until i post every single instruction. i will let you know when im done and you may post your comments/concerns/questions, etc.
Edited by mistystar - 18 years ago

Created

Last reply

Replies

35

Views

32897

Users

17

Likes

24

Frequent Posters

mistystar thumbnail
Posted: 18 years ago
***********************************************************
Tutorial 1 - Animated glitter text with glitter background
***********************************************************

For this tutorial, i will be making this kajol picture:


into:

mistystar thumbnail
Posted: 18 years ago
1. This is a continuation of my previous tutorial for glitter border avis. So please follow steps 1-9, for this image (for mine, I will use the lime green color as my background color).

http://www.india-forums.com/forum_posts.asp?TID=122827&TPN=1

Once you have finished, you will get something like this:

mistystar thumbnail
Posted: 18 years ago
2. Now minimize this image for a while. Open up a new image that is slightly larger than the original image. For my example, since my avi is 100*100, I will make mines 120*120.

3. Fill the color with whatever you want your text, and repeat the process you did to make your border glitter. You should get something like:


mistystar thumbnail
Posted: 18 years ago
4. Now this is a vvveerrryy important step. Follow very carefully.

* You need to now add the text. Use the text tool and click on the image. A new window will open and prompt you to write what you want on it. I will write Misty on mines. Click ok, and you should have something like:


* Now, cut the text by pressing together "ctrl+x", then repaste it as a selection with "ctrl+e). Now without deselecting it, select the layer that has your glitter effect on it. Press "ctrl+c", which will copy the glitter below in the form of your text.

* Now open up your previous image again, with kajol. This time, press ctrl+L and your text will appear in the form of the glitter look (make sure you rename the layer for later use.

* Now go back to the glitter text and this time, move your selection to another location on the image, one that has different patterns on it. Again, select the layer with the glitter and "ctrl+c". Now return back to your avi and paste it again. Make sure you align it exactly with your previous text.

* Repeat this procedure as many times as you want for added effects.
mistystar thumbnail
Posted: 18 years ago
5. Now it is time to add the effect.

By this time, you will have a total of 5 layers.

Top two layers will be your text, the middle layer your image of kajol, and the last two layers will be your glitter border.

6. NOW FOLLOW CLOSELY!!!!!

Open up your layer pallete so you have a better view of the layer list. (For those with PSP 9 and higher, the layer pallete is already there on the right side. For those who don't have those versions, head for the top toolbar and select "View > Palletes > Layer Pallete".

You will see the list of your 5 layers in this order

Text2
Text1
Kajol
Background1
Background2


Edited by mistystar - 18 years ago
mistystar thumbnail
Posted: 18 years ago
Save this first image by going to "File >SAVE AS >kajavi1.gif"

Now do your pallete like so:


the red X means that the layer is hidden. In order to do that, just click on the eye

Save your image again using "File > Save as > kajavi2.gif"


you should have two images now.

kajavi1.gif


kajavi2.gif


Edited by mistystar - 18 years ago
mistystar thumbnail
Posted: 18 years ago
Now head for the animation shop.

Here is where you need to open your second program. Go to "FILE > JASC SOFTWARE PROGRAMS > ANIMATION SHOP".

In this new program, click on "FILE > ANIMATION WIZARD".

Here you will be asked a series of questions.

Play around with the features until you get to "select images".

Click "add images" and put in your two files (mine were kajavi1.gif and kajavi2.gif")

Continue with the wizard until you are done!

Now preview the animation to make sure that it is to your liking. there is a preview button below the file toolbar. See if its to your liking. If you are happy with it, save it. And voila!!! you get:


**** tutorial officially complete ****
mistystar thumbnail
Posted: 18 years ago
***********************************************************
Tutorial 2: Animated Avi
***********************************************************

If you can do the glitter animation, this will be a piece of cake for you 😆

so, i will be teaching you how to make an animated avi like:

mistystar thumbnail
Posted: 18 years ago
Step 1:

Select the 3 images you want. Cut out the portion of the pic you want to use, and resize them so that they are all the same length.

(to do this, use the crop tool. When you are selecting the area, notice on the top that you have the option of setting the width and height of how much you are going to crop. Make sure you cut the same width and height for all images).

For my example, im going to use these three images: