
Coming - First Look - Love And War

Bingo Live Sessions
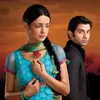
Three Years Celebration - Rocky Aur Rani Ki Prem Kahani
How to apply airbrush on a picture in GIMP
GIMP download link-
So here goes the tutorial. I am "kaccha" on giving tutorials so don't mind if u can see difficulties to understand it.😳 tutorial is given with captures. 😊
Firstly, after opening GIMP open the picture.
I have opened a child's picture.😆
Now click on the "brush" option and select the brush that I have marked through the red circle.
Then increase the size of the brush "scale" to the highest.
Now select the "Paintbrush" option and select the white colour.
Now change the opacity through decreasing. I am making the opacity 14.3. You can increase the number of it. It can be between 14-25. Choose the rate that as u think is suitable for the picture.
Now apply the brush on the picture on those parts you want to be brushed. After applying brush, the picture has become like this.
Now save the picture
And you are done.😛


 Cricket
 Fan Fictions
 Iss Pyaar Ko Kya Naam Doon

