Post all Tutorials HERE :D - Page 11

Posted: 17 years ago
wow adorablegurl..thats such a great tutorial
πŸ‘
~nabihah
Posted: 17 years ago
wow adorablegurl..thats such a great tutorial
πŸ‘
~nabihah
Posted: 17 years ago
hey guys plzzzzzzzzz help me how do you make animation siggies i have psp 7
Posted: 17 years ago
ok i kno how 2 do almost everything but da prob is it don cum out gud i mean i saw lotta ppl siggyz but mine always cum out wierd can ne1 help dat πŸ˜† πŸ˜•
Posted: 17 years ago

Originally posted by adorablegurl


hey guyz lots f ppl ask about the glow effect that khushi di have on her s but i found something similar to thaty its only for phothosp i will post it up right here


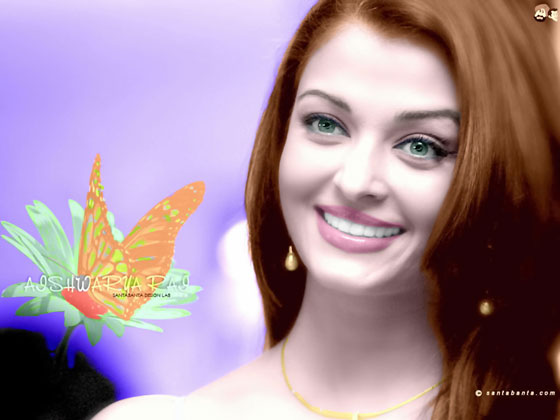
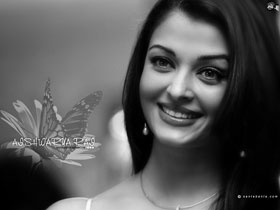
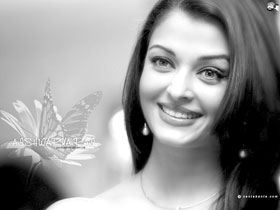
Step 1. First of all I opened this photo in Adobe Photoshop. I used the command Image ->Adjustments -> Levels ( or in layer palette the fourth one button from left *create new fill or adjustment layers) to make the image brighter.


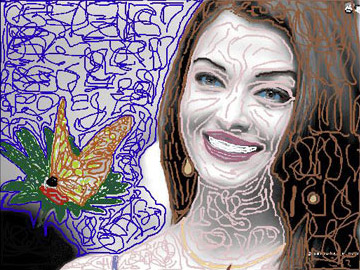
Step 2. Then I call the command Filters -> AKVIS -> Coloriage. Here I start to color my photo. I use the color pencil to color my photo. I try my best to draw very accurate border lines to give a very accurate color to my photo (as shown below).
I gave gray color to her hair and blue to eyes and white to her teeth and light pink to her lips (lips, eyes, teeth and eyebrow, necklace are circled with skin color).

It was a very hard to color the butterfly and flower but I did my best to mark the edges of them.


Step 3. Then I pressed the play button to see the result of my all work and here is the result.
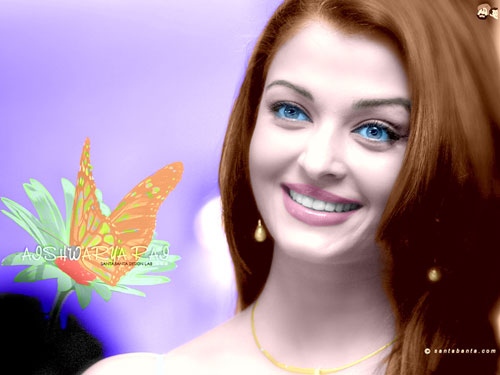


Step 4. The colorization result is applied and the plug-in's window is closed.
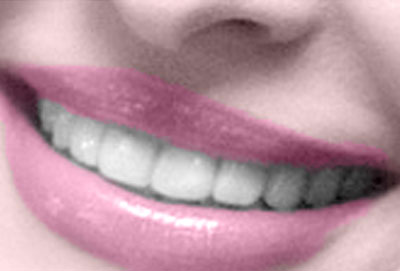
Step 5. But I found that the teeth are not white.


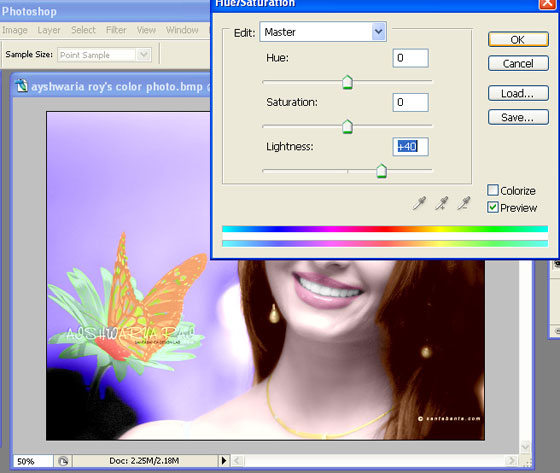
To brighten her smile, start by going to the Layers palette and clicking on the Background Layer to make it the active layer. Then use the Lasso tool (or any selection tool you're comfortable with) to put a selection around her teeth (as shown). Once selected, we'll need to soften the edges of the selection so our retouch isn't obvious, so go under the Select menu and choose Feather. When the Feather dialog box appears, enter 2 for low res images, 5 for high res, and click OK to apply this edge softening. Then go under the image menu and choose Adjustment and then choose Hue/Saturation. And in my case to reduce the darkness I increase the value of Lightness, and press enter.


Step 6. This photo was a little much noised (as shown below), so here I reduced the noise by using AKVIS Noise Buster (Filter -> AKVIS -> Noise Buster).

http://akvis.com/img/examples/coloriage/ayshwarya-ray-photo/ noise-buster.jpg

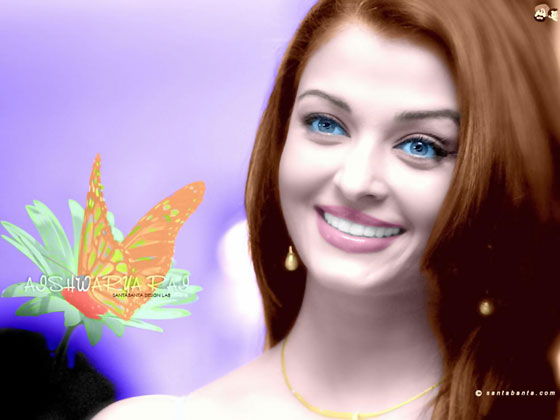
And there is my final color photo as shown below.


Step 7. Now the Picture is Good but Her Eyes are too Blue,
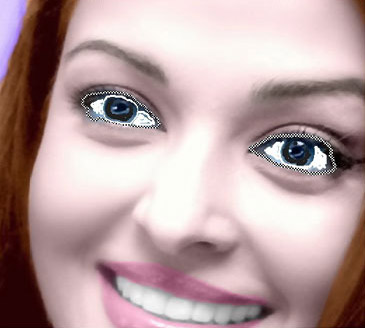
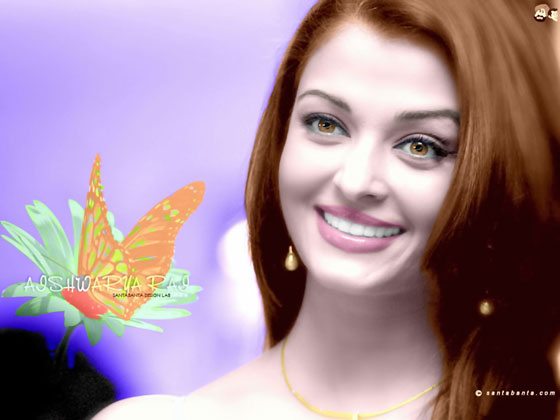
Sclera Must be White: Now my aim is to white the sclera and to change eye color. So i started from here again with Akvis Coloriage Filter for making these changes.

Again I went to the filter Menu (in Adobe Photoshop) AKVIS Coloriage. Here I started with keep color pencil to draw a very close border around her sclera and I gave it white color. I also gave a black (natural color) to eyeball.


Here Is The Procedure For Making Brown And Light Greenish Eyes.

The thing is to choose the color, mean to say that which is perfect color for your job. And it is very easy in Akvis Coloriage. Just give color and then press the run button .

If you are not satisfied with this just press Before and use eraser tool located in control panel and give another color to it. As I told you before that Akvis Coloriage Filter is on of the easiest and best solution for you complicated problems which you have with your Black & White Photos.


hope this will help u guyz
luv
tina

hey whats AKVIS?

Posted: 17 years ago
Originally posted by Nabihah


Hey everyone, i have got requests and ques on How to make a siggy...so i thought i wud make a tutorial...and ofcourse if you need further help...feel free to pm me😳 So here it goes..and please do tell me if you thnk this is help fullπŸ˜›


"How To Make A Simple Siggy Tutorial (using PSP 8)"

1. Open a new image (ctrl+n) about (w)500x(h)200. Click ok


2. You should see something like this:


3. Choose about 2-3 pictures you want in your siggy. I will choose these for the tutorial:

4. Drag the pictures into PSP 8.

5. Click on the blue bar of the 1st picture (to get that picture)

6. ctrl+a (selct all) and ctrl+c (copy) that 1st picture

7. Go to your blank new image and click on the blue bar of that blank image

8. ctrl+e (paste  -  doNOTdo: ctrl+v)

9. That image shud appear onto your blank siggy:


10. click on the deform tool:
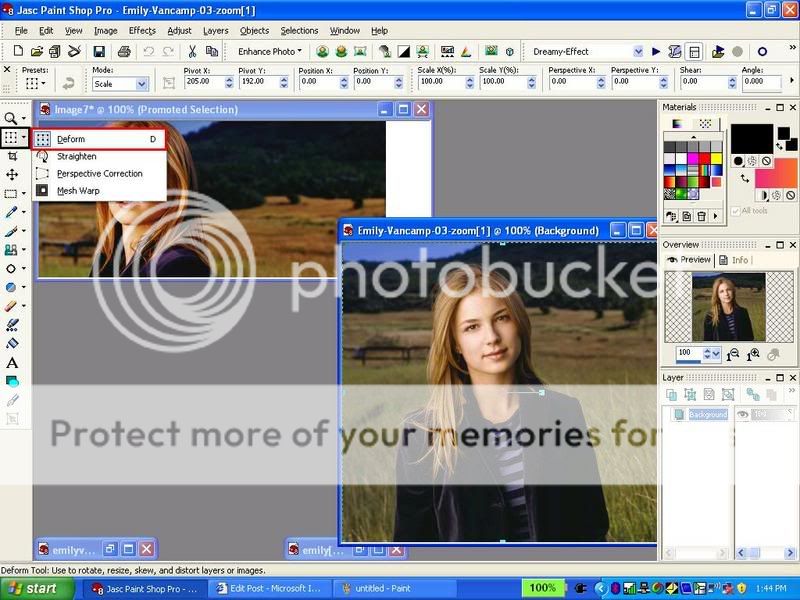
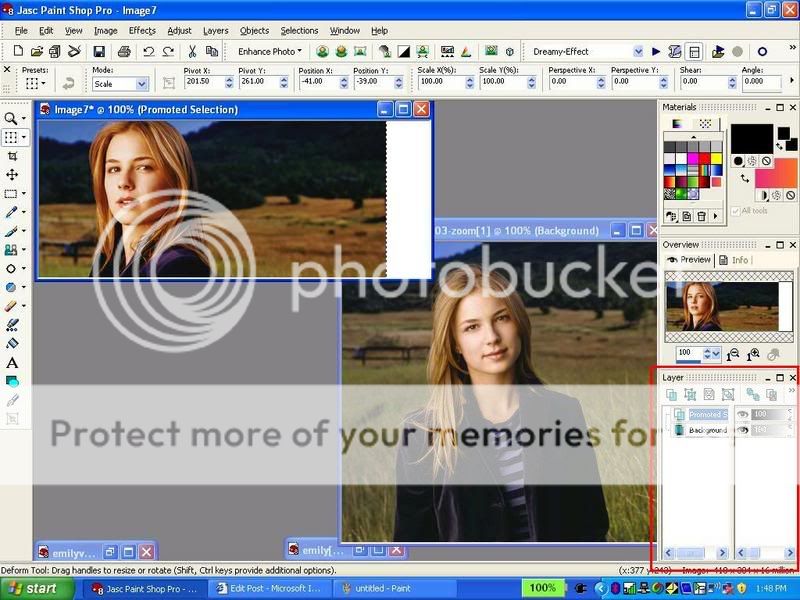
11. Click on that picture and a message like this shud come up. Click ok. this will make a Promoted layer for you. This is very important. Check you layers palette to see if you have now two layers: Backround and Promoted Layer. 


12. You can change the place and size of your 1st pic w/ the deform tool...do this if you want before you go onto the second pic.

13. Ok, now go to your second picture: repeat the same things that you did with your 1st picture. (add the pic to ur siggy basically the way u did with your 1st pic)

14. Now you should have 3 layers in your layer palette of your siggy
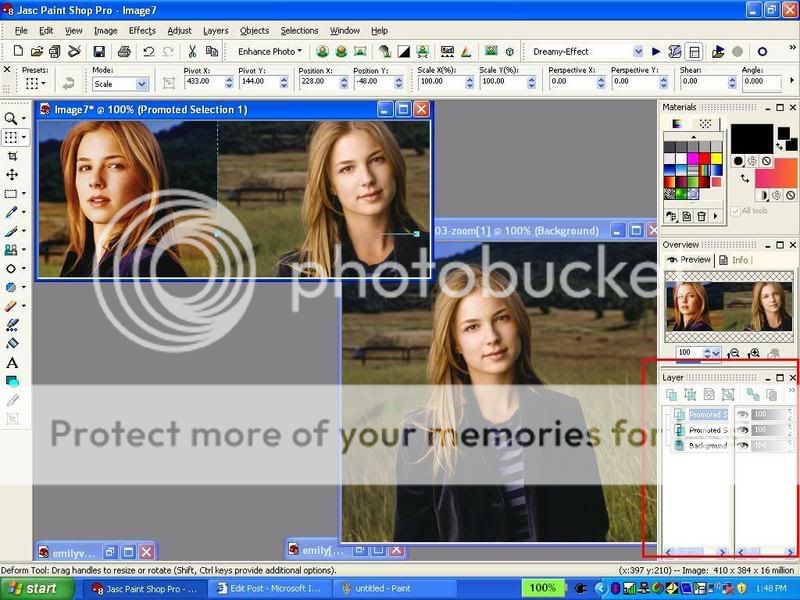
 

15. Now Add your 3rd pic the way u did with ur 1st and second pic

16. Now you should have 4 layers in your layer palette.
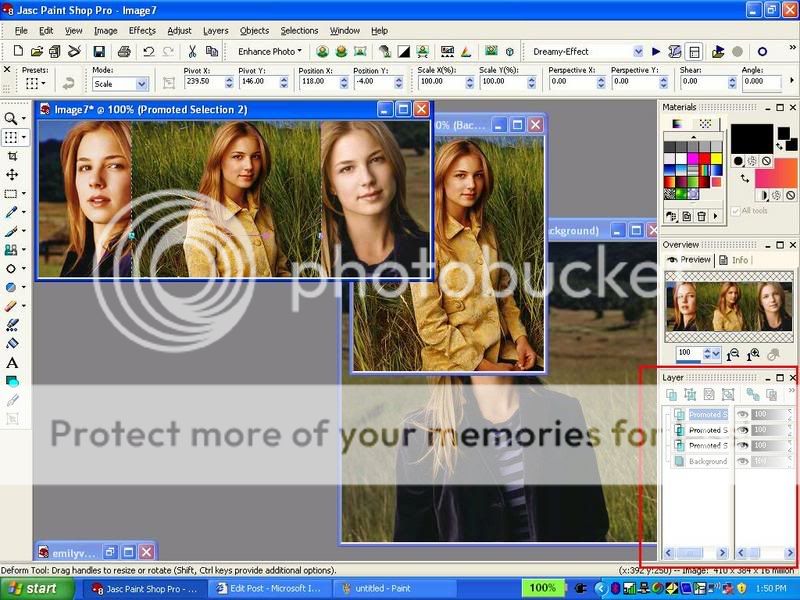
 

17. Now your siggy looks kinda unblended right? well i have a little secret i use to blend...i use the eraser tool: So selct this tool. Make the settings like mine (second pic) (but ofcourse you can adjust the settings urself to fit ur preference)
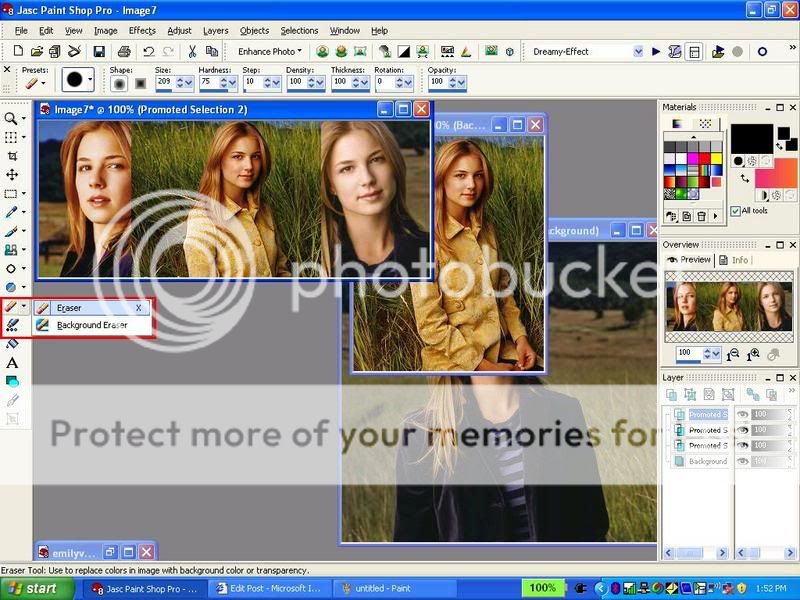
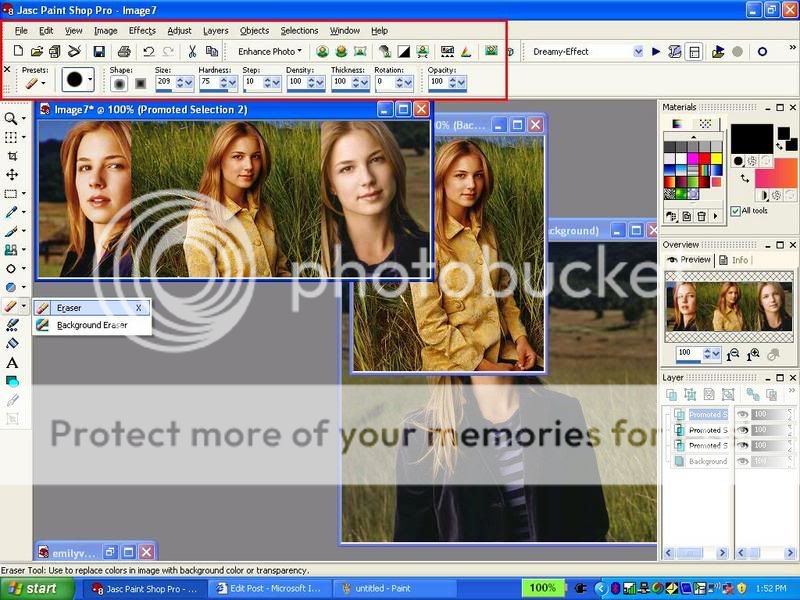
 

18. then selct your topest layer in ur layer palette. (ur4th layer)

19. Erase a bit of your 3rd pic on ur sigy with the tool so it looks kinda blended with the pics below it. Like this:
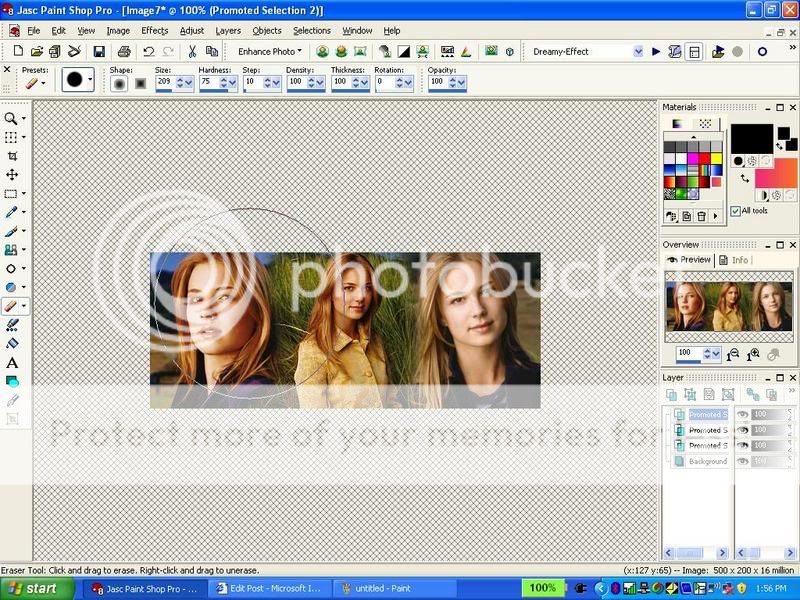
20. Now repeat the eraser tool if you want with your 2nd and 1st pic if you want. But i thnk that im done with that part.

*****You dnt have to do this******

21. I will add some brushes now.

22. Select your brush tool:
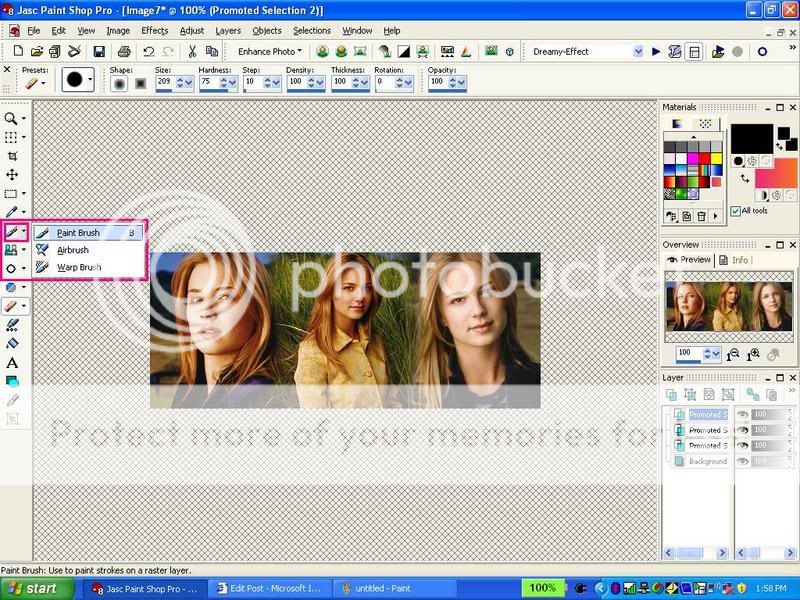
 

23. Choose your brush color from your materials palette (i will choose white)
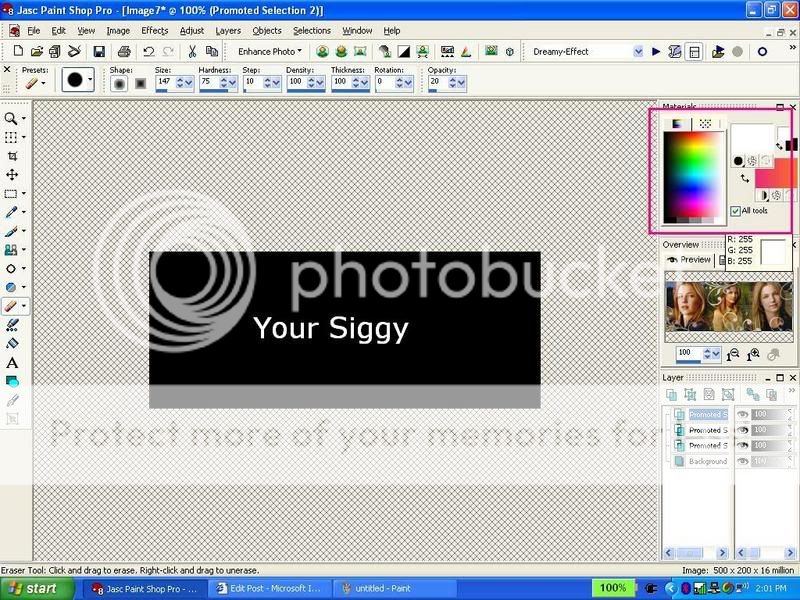
24. Choose your brushes from here: (i added most of my brushes..if u r a starter u probably have the normal brushes that PSP came with. You can use those.)
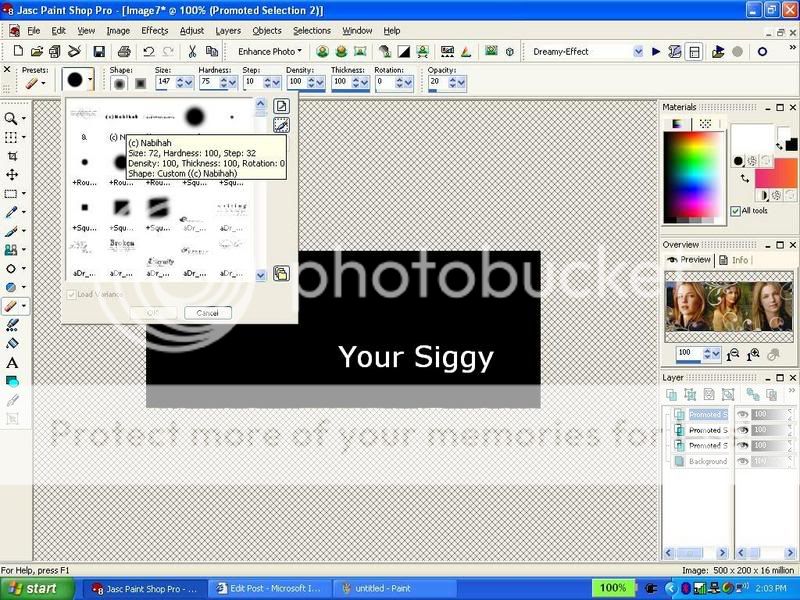
25. Add your brushes. where you want..this is what i got using the brushes i added...as i said b4 u can use the strters ones too. (i put a copyrite brush on there i made)
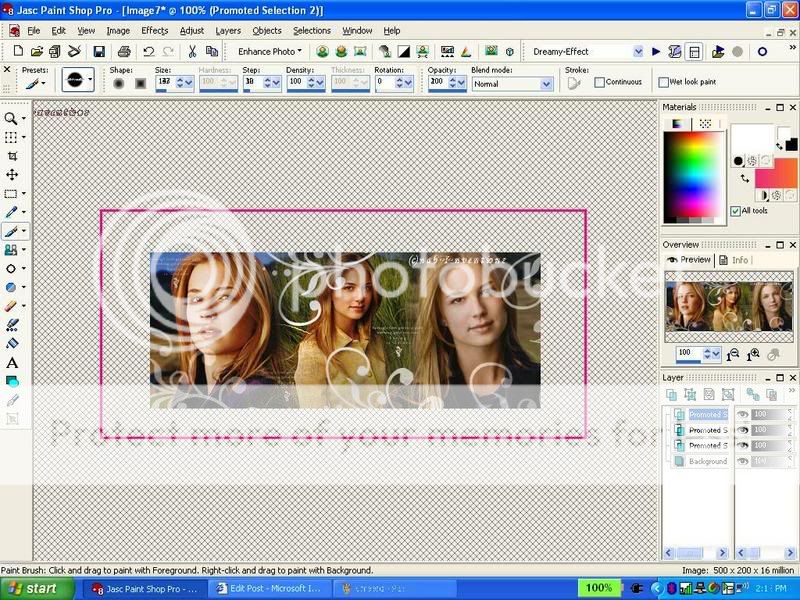
26. Now i will add text: choose your text tool:
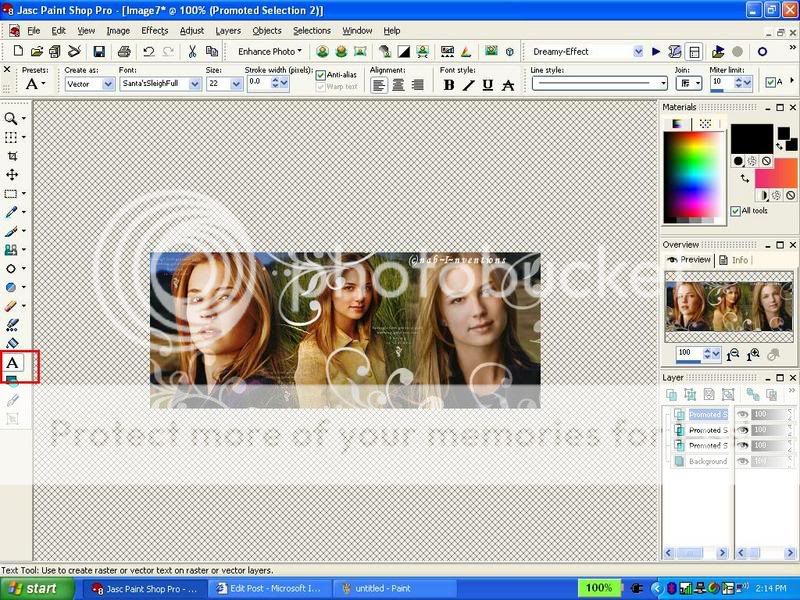
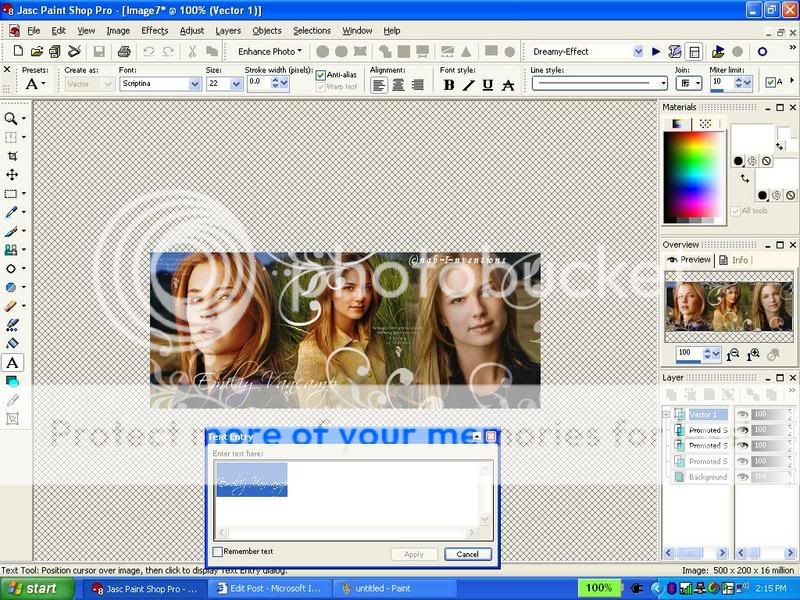
27. Type you text..selct the text and choose he text color and font and font size...click apply...you can also move ur text in different places...u can slant it etc...
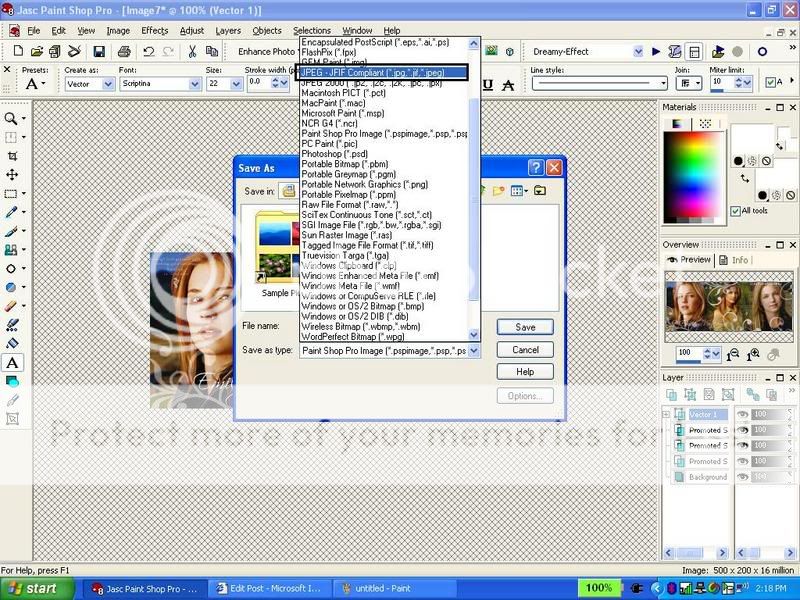
28. press f12 or save as under file and save it: type ur name...but change the file type into a ----.jpg... (there are two jpg choices , choose the one i highlighted....
29. πŸ‘AND YOUR DONE!!! CONGRADULATIONS! YOU HAVE MADE YOUR 1st SIGGY!πŸ‘

30. Now upload your siggy and share it with me and everyone here!


Tips:

1. You will definately improve as you make more sigs just like me!😳

2. Brushes are a little bit more for advanced and experienced PSP users...beginers can use it after they are a little more familiarized with PSP

3. Dont care that much about the appearance of the siggy! its the effort that counts!!!!!

4. ALWAYS! ALWAYS! add ur copyright sign either using text tool or brush!


Palette/Toolbar tips:

how to see your layer palette: view>palettes>layers

how to see your toolbar: view>toolbars>tools

how to see overview: view>palettes>overview

Have FUN!


did this help?

p.s. this tutorial is copywrited so please dont claim it as ur own!


~Nabihah...


Hey i made 1 by ur help dis is like my 1st 1. n i donno how is is it and ya i used PSP 7

Posted: 17 years ago
Originally posted by cutedia


Hey i made 1 by ur help dis is like my 1st 1. n i donno how is is it and ya i used PSP 7

good work 😊

Posted: 17 years ago
hey guys,
can some pleae please tell me how to make the right picture more like the left side of the pic? i tried using curves... but no avail!! the pic just gets brighter!!! can someon please please help me


thank u

pri
Posted: 17 years ago

Originally posted by pc84


hey guys,
can some pleae please tell me how to make the right picture more like the left side of the pic? i tried using curves... but no avail!! the pic just gets brighter!!! can someon please please help me


thank u

pri
k u duplicate the layer n set it to screen 100% merge visibile thn duplicate again n set it to hard light 50%

hope it helps

Posted: 17 years ago
hey canneov u tell me how 2do heart's like dat


i really wanna learn 😭

Related Topics

doc-text Topics pencil Author stackexchange Replies eye Views clock Last Post Reply
Shiri'z Tutorials *Making a Banner* Page 4

pencil ExoticDisaster   stackexchange 35   eye 2431

ExoticDisaster 35 2431 1 months ago x.titli.x

Topic Info

281 Participants 936 Replies 317995Views

Topic started by Tumhari_Khushi

Last replied by divyankat

loader
loader
up-open TOP