Avatar & Signatures Shop

Post All Tutorials Here #4 - Page 12

Created

Last reply

Replies

1031

Views

129849

Users

123

Likes

2823

Frequent Posters

Trouble. thumbnail
Anniversary 12 Thumbnail Group Promotion 6 Thumbnail + 3
Posted: 10 years ago
Originally posted by: -CuteSomi-


Will be waiting 

When will we get to see your PSD's?😛
incognito. thumbnail
Anniversary 11 Thumbnail Group Promotion 5 Thumbnail + 5
Posted: 10 years ago
Originally posted by: Trouble.

When will we get to see your PSD's?😛


After July 😆 Once I'm done with exams and all.
haminasto thumbnail
Anniversary 13 Thumbnail Group Promotion 6 Thumbnail + 6
Posted: 10 years ago
Originally posted by: Baki

Can somebody explain me how to make these kind of avis?


with reference to the SaraswatiChandra avi , this tut will only explain how it is made , credit goes to the original avi maker for that SC creation.
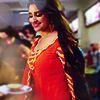
In place of Saras im using Chan Chan's pics...the end result is not modified with any PSD or effect , so its a request not to use  it to create anything of your own.


This tut is to "in tween" two pics...the tween pics are black n white.

STEP1: make a white background document and use 2 different pics , one placed to the left and the other to the right.


Saras closed eye pic in this tut is Chan Chan smiling and open eyes is Chanchan with a diya.


_________

STEP2: Duplicate both these pics respectively and as the "tween" is black n white im going to "desaturate" the duplicated pics.

to desaturate go to Image<adjustments< Desaturate.(pics in red n blue rectangle)
IMP: Now slightly reduce the sizes of both the colored pics by using "transform."


NOTE: follow the above pic n these words:
a.look closely at the Saras avi...it starts with a colored closed eyes Saras(colored smiling chanchan reduced size..layer above bg).

b.shifts to side to a bigger black n white open eyed Saras(layer in blue rectangle).

c.which reduces in size to a colored open eyed Saras(layer above blue rectangle..reduced in size)
.

d.shifts to left to a black n white closed eyes Saras(layer in red rectangle).

e.which returns to "a" as reduced colored closed eyes Saras(colored smiling chanchan reduced size..layer above bg).

so this is the flow in which your layers should be in the layer panel.

_________

STEP3: point a & b
in the animation tab , duplicate frame 1.

when you will duplicate it the frame 2 will also have the same pic but we want the black n white one here so keep the frame 2 selected and go to layer panel n make the "Layer in blue rectangle visible"


__________

STEP4:now in the animation tab frame 2 will have the BW pic.
keep this frame selected and click the "tween" button(red rectangle)


keep these settings:"tween with: Previous frame":


your first "tween" is done:(tween is overlapped layers in frame 2 & 3 in red...previous frame 2 is now frame 4)


___________


STEP5: point c
now "duplicate" frame 4
frame 5 happens...this frame will have same pic as frame 4...keep frame 5 selected and go to layer panel and make the next layer visible:


frame 5 will have the transformed reduce colored pic of the BW pic that you have tweened above.

keeping frame 5 selected click "tween" button and apply same settings as you did before.
tween done.

__________


STEP6: now you will have 7 frames...duplicate frame 7.
frame 8 happens...on this the last pic have to be made visible.

keep frame 8 selected and make the pic in blue rectangle visible.


___________


STEP7: point d
keep frame 8 selected and apply the "tween" same settings as before.


frame 8 & 9 are now the tween and frame 10 is your last tweening frame.


____________

STEP8: point e:
this tween is between the last frame and frame1.
keep frame 10(last frame) selected and make the layers in the red rectangle non-visible.(pic below)
at this time only those layers in the layer panel should have that "eye" which are ticked in green and which you are "tweening."


apply these settings:
please see that here " tween with: is set to "first frame":


now your last frame will look overlapped and not a clear pic like it used to happen in above 3 tweens because the clear pic for this last tween is frame 1.


i have timed it to '0.09 sec'...its not necessary to have a loop time , you can go with 'no delay'.

end result:donot use it in any form what so ever.


Edited by 18shabbo - 10 years ago
shadesofme thumbnail
Anniversary 13 Thumbnail Group Promotion 6 Thumbnail + 5
Posted: 10 years ago
@18shabbo
that was very useful tut...
incognito. thumbnail
Anniversary 11 Thumbnail Group Promotion 5 Thumbnail + 5
Posted: 10 years ago
Thats an amazing tut nabila :) Very very helpful! Can you also give a tut on how to add filter to GIFs in PS CS5 without the timeline option?
RadiantTreasure thumbnail
Anniversary 14 Thumbnail Group Promotion 4 Thumbnail + 5
Posted: 10 years ago
@18shabbo- thanks for Awesome tut!

I realized that previous link of Photoshop doesn't have TIMELINE options and so does other links.
So i uploaded my link!😳
It's a RAR file..so u will need WINRAR/ZIP to extract it!
Just let me know if it works and has timeline option present when u download it!

Hopefully this will help everyone out there for using filters on gif's!

PS CS 5 Timeline Option.

Sri.

Edited by Xx.Sri.xX - 10 years ago
.dream-catcher. thumbnail
Anniversary 13 Thumbnail Group Promotion 6 Thumbnail + 6
Posted: 10 years ago
Nabila amazing tutorial.. Very well explained 😳 Thanks for your effort..
I tried it here..

All credits to you <3
-KimSungHyun- thumbnail
Anniversary 17 Thumbnail Group Promotion 6 Thumbnail + 6
Posted: 10 years ago


THIS IS A "MEMBERS ONLY" POST
The Author of this post have chosen to restrict the content of this Post to members only.


haminasto thumbnail
Anniversary 13 Thumbnail Group Promotion 6 Thumbnail + 6
Posted: 10 years ago

@Pooja..your welcome! happy to help...n that avi came out really wonderful👏


tutorial to make a glitter text with plain color outline.

My Glitter is going to  be silver in color.

STEP1:make a new transparent document , size depending on your need and using the "text tool" type a text.


________

STEP2:you will have a text layer in layer panel now.Its good to use "fonts" which are thick and can have lots of glitter.
But its not a necessity.Im using "James Fajardo" which is medium.


________

STEP3:Now add an outline with a plain color of your choice.
As im going to use "silver glitter" , my outline will be of "dark color."

Go to Layer<Layer Style<Outer Glow.


these are my outer glow settings.
NOTE: if your text and any other design you're using to fill in glitter has perfect edges , then you can use the "technique:precise"rather than softer.


outer glow (outline)added:


________

STEP4: Create a "new layer" above text layer and having a "light grey color" in foreground and using "paint bucket tool" , fill this layer.


________

STEP5:(Glitter step)
Keep the new layer selected and go to Filter<Noise<Add Noise.


these are my noise settings: monochromatic box should be ticked... now the layer will look distorted.


________

STEP6:(Glitter adding step)
Keep this layer selected still and now go to Layer<Create Clipping Mask


now you will see that "Glitter" is added to your "black text" and outline remains as it is.
The symbol for Clipping Mask is an inverted "enter key sign."


________

STEP7:(blinking glitter)
Now make another layer above this "glitter layer."
Im using same "light grey" color , (you can change the color if you want) and using the "paint bucket tool" fill this layer as well.


_________

STEP8:
(blinking glitter)
Add noise to it as well , but here the settings will be changed a little.
Change the amount to something different from last time.
these are my settings: click ok and now there will be another glitter layer.


_________

STEP9:
(blinking glitter)
Add clipping Mask to it as well and now there are 2 clipped glitter layer on the text.


_________

STEP10:
(blinking glitter)
Now go down to your animation tab.
Till now there will be only one frame , but to make this text "glitter/blink" use the "duplicate button" and duplicate the frame 1 three time to have a total of 4 frames.(you can have as many as you want , but i use 4.)


_________

STEP11:(blinking)
a.)Now select frame 1 and go to the 2nd glitter layer(topmost) and close its visibility.
this layer will now be "non-visible in all frames."
but the 1st glitter layer will be and should remain visible through out.


b.) go to frame 2 and now in the layer panel make the 2nd glitter layer
(topmost) "visible."


c.) in frame 3 see that again 2nd glitter layer
(topmost) is " non-visible."


d.) and now in the last frame check that
2nd glitter layer(topmost) is "visible."

keep loop to "forever". Time is "no delay" to make the blinking fast , but you can add time of your choice. Save as .gif/for web devices.


end result:

Edited by 18shabbo - 10 years ago
Trouble. thumbnail
Anniversary 12 Thumbnail Group Promotion 6 Thumbnail + 3
Posted: 10 years ago


THIS IS A "MEMBERS ONLY" POST
The Author of this post have chosen to restrict the content of this Post to members only.